Quilt #4: Crosstown Buzz

I started working on this quilt in April 2021 when I first picked up Urban Quilting by Wendy Chow. Her book was one of the first quilting books I ever bought. When I was searching for books online I was immediately drawn to her modern patterns and bright colors. I decided to try my hand at the throw version of ‘Crosstown Buzz’ in a green and pink color palette. At this time I was shopping mostly from Pins and Needles so I picked out the Tiger Lily collection (Paintbrush Studio), a shetland flannel in a russet herringbone (Robert Kaufman), and a solid in the color Willow (Kona). I also picked up Aurifil 50 weight thread in Light Peony and Medium Spruce (2437 & 2885).

Initial fabric picks pulled from Pins & Needles

The first cuts of my fabric selection

While it was the 2nd quilt I had ever started, it was the first quilt I was making for myself (rather than giving it away). But because of this, this quilt ended up getting deprioritized in favor of the baby quilts I was making in 2021/2022. Then of course, when everything was put on pause while I was dealing with health issues, this quilt was left in a partial state.

Picking up this quilt was quite intimidating for several reasons. Mostly because I had to reckon with my old mistakes when trying to finish this quilt. Here is a quick summary of my past sins:

1) Due to the amount of pieces needed, I had try to cut my strips and triangles in bulk but hadn’t developed the techniques at the time to successfully cut it evenly and consistently.

2) I had not sewed all my seams with the same seam allowance. Which made my flying geese triangles smaller than they should of been.

3) While I had completely pieced half the blocks and squared them up before abandoning the project, there was still half the quilt to finish piecing. And for a 72 x 72 inch quilt that is not insignificant.

So I already knew walking back into this project I would need to do some aggressive cutting to try to keep things square and that I was going to have issues with my triangles lining up.

In Oct 2023, I started trying to orient myself to where I had left off in the pattern so I could pick up the rest of my pieces and make up the second half of the blocks. As I predicted, I ended up having to cut off quite a bit to square them up.

Once I had all the blocks completed, the next challenge was getting all the blocks to line up. I quickly realized that I was going to have cases where two halves of the triangle were not going to line up and that there wasn’t really much I could do about that.

By this point it was Nov 2023 and I was nervous about trying to feed this quilt through my 15-91 for the actual quilting part of the process due to the sheer size and I was also beginning to have issues with my thread snapping while quilting on my 15-91. Despite my attempts to adjust the tension, I was unable to solve the problem. So while I was arranging for my 15-91 to be serviced, I decided to take the opportunity to try out a Pfaff Ambition 620 at my local quilt shop.

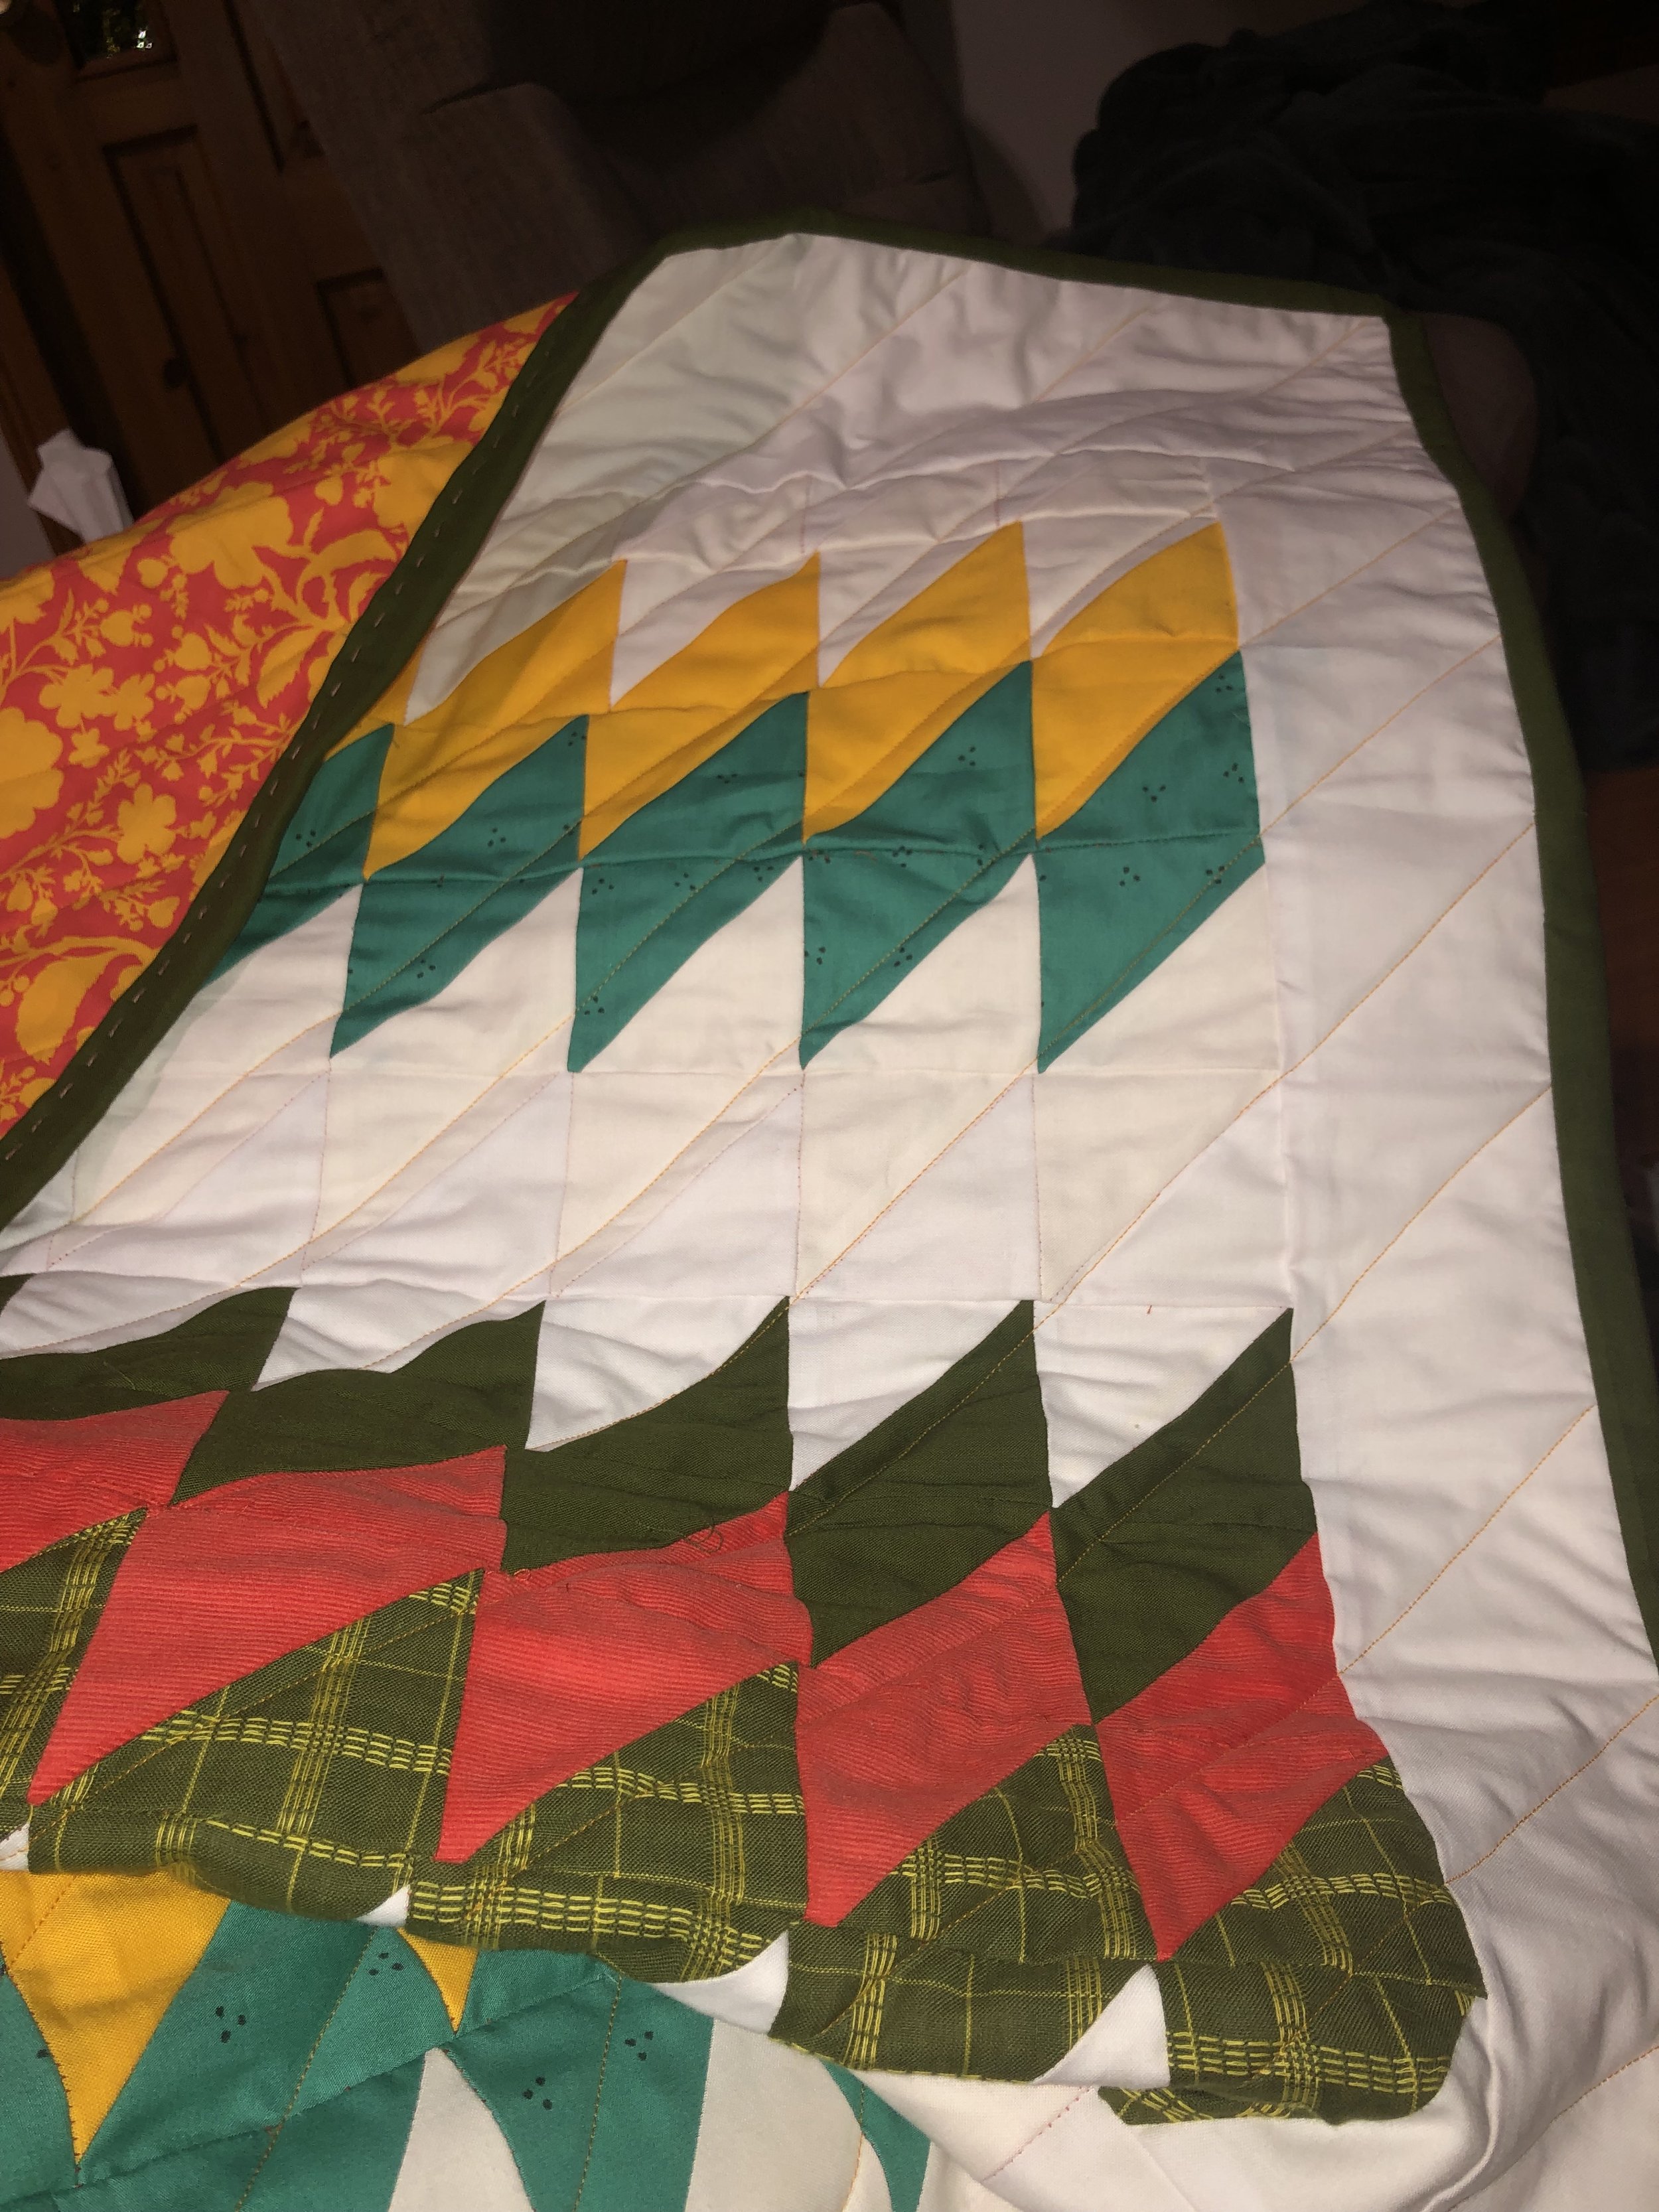
I stitched in the ditch of the blocks using Light Peony as my bobbin thread (for the backing) and Medium Spruce as my thread for the front. The blocks are quite large though in this pattern, hence I was worried that the quilt spacing wasn’t dense enough. So I decided to add some hand stitching in 8 wt Acorn Thread’s ‘Maple Syrup’ (Trailhead Yarns) around one triangle in every block.

This kept me busy for a month or so and finally in Jan 2024 I was ready to tackle the binding. I ended up keeping the solid fabric in Willow (Kona) for the binding and machine sewed it to the front with my 15-91 (which had returned from servicing by this point). I finished the binding with hand stitching in the same 8 wt Acorn Thread’s ‘Maple Syrup’ (Trailhead Yarns). As I worked on the binding, I found a few places on the front where I failed to catch part of the binding due to misaligning my binding layers. Which led to me having to hand repair a few spots.

Hand stitching around a triangle

Hand stitching the binding to the back of the quilt

Repairing part of the binding

After a round in my washer and dryer, I did my final inspection for loose threads and weak spots. All I found was a few more spots on the binding that I had to hand stitch. Below is the final result!

I’m still struggling to figure out how to photograph quilts that are as large as this one. Short of hanging it from the ceiling, I’m not sure what else I can do.

It is a big relief to finally finish this quilt. And now that it is done I can comfortably move on to new things. I’m still trying to decide what my next quilt should be but I think I will take a break from triangles for a little while.

Update + Quilt #3

I’ve been on a somewhat long and unintended hiatus. My last post was in January 2022 although the last time I was really actively and regularly posting was August 2021. It is not as though I wasn’t thinking about quilting or Singer 15-91s. Over the last two years I was occasionally buying fabric, patterns, and sewing equipment. I even had a grand plan to go over all the different sewing feet you can use on a Singer 15-91 and film demonstrations of it. But of course that didn’t happen.

Health-wise I had things going on that made it difficult to set aside time to quilt (or even blog about Singer 15-91s). I was often too tired and all my projects gathered dust. And then, when I started to feel better about six months ago, I was busy planning for a wedding. It wasn’t until very recently that I pulled myself together (and stopped staring guiltily at my fabric stash and quilting supplies) to actually work on one of my abandoned quilts. Part of the this was driven by the fact I had a coworker with a new baby and I wanted to gift a quilt to them. Another reason was that I had signed up for a class on hand quilting a binding and needed to bring in a project far enough along to practice on in class.

I think I’m in a better place now to post more actively here. I will first focus on wrapping up my abandoned projects and then transition into new Singer 15-91 content.

Quilt #3

Speaking of abandoned projects, I have just finished one. It is a long overdue baby quilt that I originally started for another baby. But after a year, it seemed like I had missed the window of opportunity to finish it and gift it. When another coworker recently had a baby, I decided I need to revisit this quilt and complete it. So eager was I to get this quilt at the door that I forgot to take good photos of it. I only have a few snapshots from my phone.

Mostly the front of the quilt with the back folded over. The top group of colors is repeated at the bottom.

Stitches from hand binding showing up on the back of the quilt

I followed the pattern ‘Angelos Mini’ from Southwest Modern (by Kristi Schroeder). As you can see it is somewhat similar to a diamond pattern although it is more like stacked rectangles. In terms of color, I picked Kona cotton colors (Sunny, Avocado, Snow, and white) mixed with a vibrant salmon corduroy and patterned blue and green fabrics. The back, which you can see folded over in the photos, is a Tula Pink cotton (specifically Wildflower in Snapdragon). I’m aware that some people have strong opinions that baby quilts should be pastels and neutral colors, but I think these colors came together in such a fun way. The corduroy also added some nice texture.

I didn’t do anything fancy with the quilting technique (just diagonal lines) but a fun part of the quilt was the binding. Recently, I learned 5 techniques for hand stitching and it was fun to apply one of them to the binding using Acorn Hand Dyed Threads (by Trailhead Yarns) thread for this particular project.

I did have some difficulties with the pattern though. Despite following the instructions, somehow the border strips were too short for the top quilt and I had to cut back some of my pattern at the top and bottom. Additionally, despite using color catchers, I also had a brief scare about color transfer when I washed the quilt. After seeing some yellow staining, I ran the quilt through the washer about three more times to remove it. All the washing though resulted in some weak points in my quilt top to come undone (specifically seams between two triangles). And I had to hand bind those weak points in two places. On one hand, it is better that I caught this now before sending it. Since this is a baby quilt I expect it to be washed often and these weak points would have been eventually exposed. Catching it now means I can reinforce those areas so the quilt can last longer. On the other hand, it is a bit of a disappointment that after all that hard work my quilt came apart a bit, and I have to put some visible mending on the front before gifting it.

I feel like every project I’ve done so far is a bit of a struggle in terms of piecing together the quilt top. If it isn’t cutting inconsistent fabric pieces, then it is inconsistent stitching which leads to things not lining up properly. Or sometime falling apart as in this case. While I’m sure I am improving since I first started, I still feel like I’m falling a bit short. Which is why it is one of my goals to really improve my piecing work.

One of the things that surprised me was my enjoyment of using hand stitching techniques. While it does take a little more time, I thought the hand stitching on the binding was very aesthetically pleasing despite me being a beginner and my stitches not being completely straight or even. I’m looking forward to doing more of that type of work.

I also really enjoyed using corduroy. It took a little bit of consideration to make sure I was cutting and piecing the grooves/wales (in the fabric) in the same direction, but having that texture in the finished quilt was amazing. I’m looking forward to using it in more projects (as I have a pile of corduroy sitting in my fabric stash).