I actually think the 15-91 manual does a decent job describing how to wind the bobbin, but I decided to write about my experience and include some more reference photos if you are struggling like I was.
Loosen the stop motion screw
The first thing you want to do is loosen the stop motion screw on the balance wheel. If you are looking at the manual, you will see this described at the end of pg 12. You do this so that when you wind the bobbin you aren’t also engaging the needle on the machine (unless you want to wind the bobbin while you are sewing). You only need to loosen the screw a little bit, until you reach the point you can turn the the little metal wheel. As with the screw, you don’t need to turn the metal wheel that much, only until when you move the balance wheel the needle no longer moves.


Bobbin and Bobbin Winder
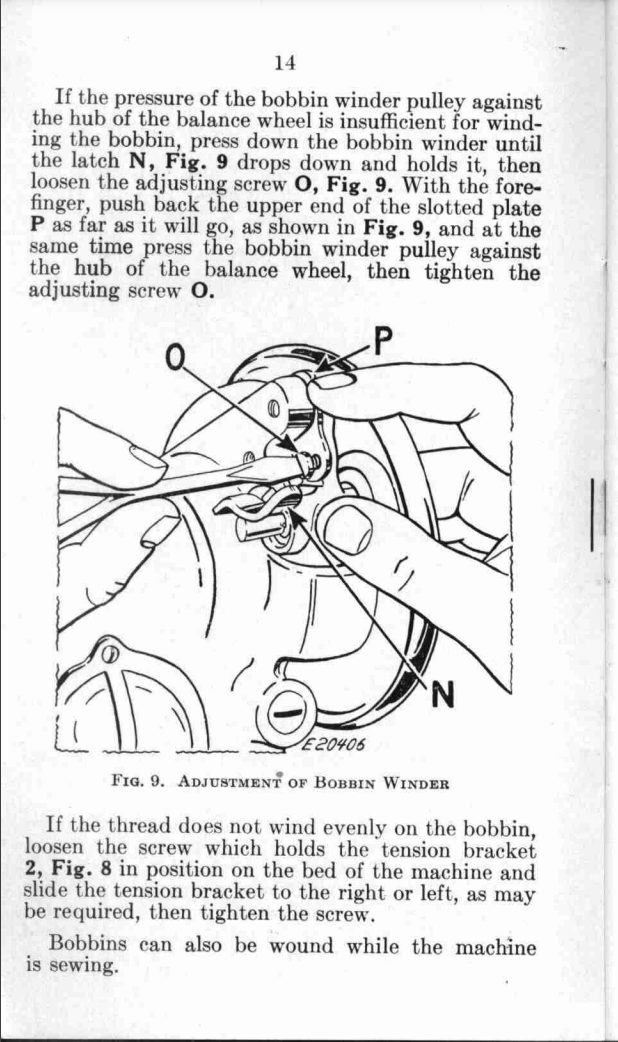
The manual doesn’t describe adjusting the bobbin winder until pg 14, but I feel like is a useful thing to do before trying to actually wind the bobbin. Doing this will help make sure the pressure for the bobbin winder pulley is appropriate and will actually wind the bobbin.
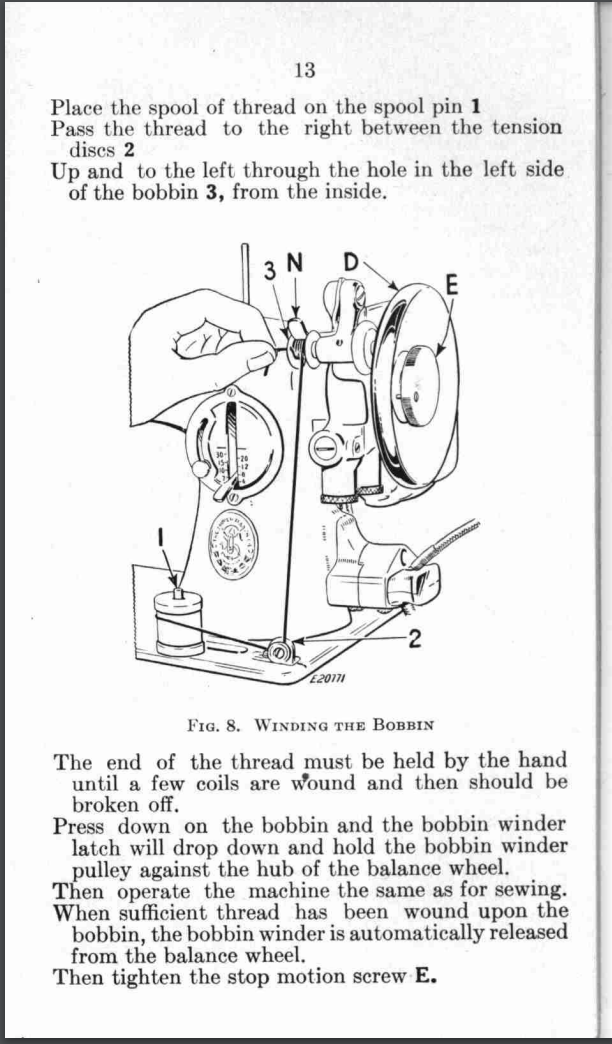
Now that the machine is adjusted appropriately, it is time to pick your bobbin. As I mentioned in my 15-91 bobbin and bobbin cases post, make sure your bobbin is not bent or deformed. As you turn it, you will notice there is a notch in the side of the bobbin case. This is important because it will align with a notch on the bobbin winder.


Now that you have inspected the bobbin, go ahead and follow the manual’s instructions to place your thread and bobbin on the machine. When you bring up the thread to the bobbin you will want to thread it through a hole of the left side from the inside and make sure the bobbin is placed on the bobbin winder with the notch lined up in the correct position. Press down the bobbin winder latch against the bobbin.


Now, if everything has been done correctly you should be able to press you pedal (or in my case, my knee pedal), and the bobbin will start to wind with thread. If you are like me, you may end up having to go back and adjust the bobbin winder if you bobbin isn’t winding. Or you can manually roll the bobbin winder pulley a few turns to see if that helps to create enough pressure for the bobbin to begin to wind. Below are some videos, where after some troubleshooting I was able to successfully wind the bobbins with thread.
Some challenges I ran into is that some of my thread spools were a little light (made of plastic), so they had a tendency to rattle off the spool pin if I didn’t hold them down lightly. Also when the manual suggests breaking off the end of thread after a few coils are wound on the bobbin, take that advice. I ended up regretting it when I didn’t do it and my thread end spun out of my hand and wrapped around the bobbin.
If you notice your bobbin winder latch is hot after winding your bobbin, it might be an indication that the pressure is too high and that you need to adjust the bobbin winder again.
ALSO, don’t forget after you finishing winding your bobbins, to tighten your metal wheel and stop motion screw on the balance wheel. Otherwise you will have trouble sewing later on.