
Example of a quilt’s binding. The binding tape is the strip of green fabric with white polka dots.
After writing Quilting (the basics), I realized that binding tape probably deserved its own post. Since I’m not working with binding tape yet myself, I’m not going to explicitly talk about how to make binding tape or how to attach it, but you will see a lot of my references do go in more detail as I try to explain what is binding tape, and all the different options for binding tape from a quilting perspective. When I get to the point where I’m actually making binding tape for my quilts, I’ll make posts more specific about the process of making binding tape.
What is binding tape?
As mentioned in my previous post, binding tape is strips of fabric used to finish the edge of your quilt (i.e. the binding). The strips can be cut out of fabric cut lengthwise, crosswise, or on the bias. Binding tape cut on the bias, is also known as bias tape. You can buy binding tape in a store, or make it yourself.
Single Fold vs Double Fold
One of first things you will need to decide when it comes to binding tape, is if you want single fold binding tape, or double fold binding tape. If you are making you own binding it will affect the width of strips you need to cut, and if you are buying from a store, you risk getting the wrong width if you don’t know what you want. In very basic terms, single fold binding tape is where the edges of the fabric are folded towards the middle. Double fold binding tape has the edges of the fabric folded towards the middle and its folded in on itself. Blueprints for Sewing has a helpful diagram if you are having trouble visualizing.
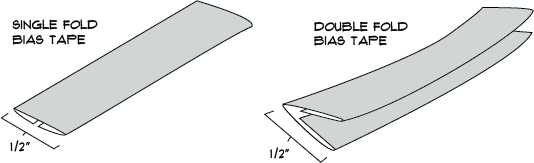
For me personally, this is the point where most blogs on binding tape lost me. Because I look at images of single fold binding tape vs double fold binding tape, and ask myself, isn’t double fold tape just folded over single fold tape? When I sew single fold tape onto the edge of my quilt and then fold it over to sew on the other side, doesn’t that just become double fold tape?
I spend a few frustrating hours searching the internet, trying to understand the difference. And then I hit youtube. It is there that I realized that the difference between single fold tape and double fold tape isn’t so much about how it is made, it is actually about how it is sewn and applied to the quilt (or whatever project you are working on). You see, for single fold binding tape when you sew the tape on one side of the quilt and then flip it over to sew on the other side, you do it in a way that the binding tape will only show on ONE side of the quilt. You can see that demonstrated by Melly Sews here. With double fold binding tape, you sew it in a way where you can see it on BOTH sides of the quilt. Treasurie demonstrates this here, in two different methods for double fold binding. Since I don’t have great examples of single fold vs double fold bindings lying around, I grabbed some from Well Sew to help you understand if you are still confused.
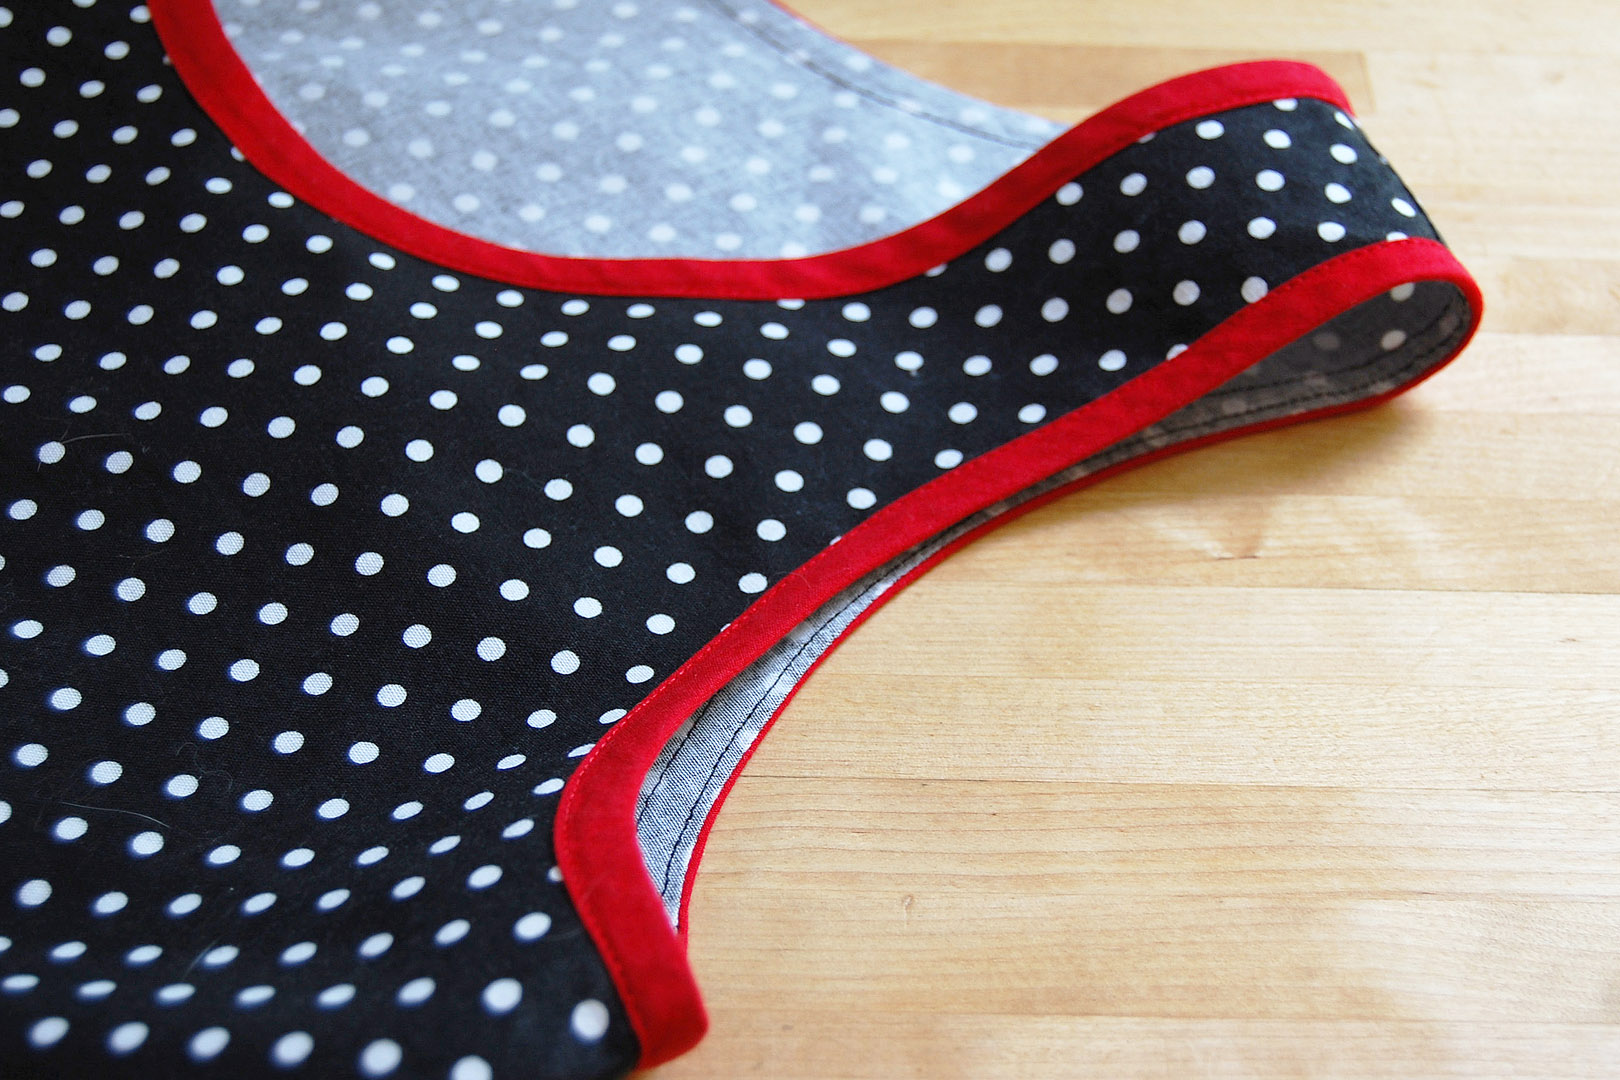
Single Fold: As you can see here on the Well Sew’s shirt, the binding is hiding the raw edge of the shirt fabric, but the red binding is only showing on the “right” side of the shirt.

Double Fold: Well Sew is showing the front and back of their project here. You can see that the binding is not only hiding the raw edge, but appears on both sides
Understanding this difference makes it more obvious why in the quilting world, we talk more about double fold binding than single fold binding. Putting aside any aesthetics of how you want your quilt to look, if you expect your quilt to be heavily used, then a double fold binding is the better choice. A single fold binding is far more susceptible to wear.
Binding Tape: Why direction of fabric matters
As I mentioned above, binding strips can be cut out of fabric lengthwise, crosswise, or on the bias. I think Village Bound covers this very well in their blog post on binding tape. In summary though, if you are looking for binding tape that can stretch (i.e. around rounded corners), then binding tape cut on the bias (i.e. bias tape) is the best choice. If you care less about stretch, then lengthwise or crosswise cut tape would be your other options. There are of course other considerations when creating binding tape:
If you are trying to avoid fabric waste, you might go with crosswise cutting (or a very carefully planned bias cut)
If using a patterned fabric (like stripes), your choice of fabric cut for your binding might be more influenced by the direction of the pattern. Shelley Hong uses some examples from Polly Danger to illustrate how differences in how you cut striped fabric could really impact what the finished binding tape looks. I couldn’t find the original Polly Danger source so I’m linking you directly to Shelley Hong.
Binding Tape Width
How wide you want your binding to be on a quilt is a bit of a subjective question, but from what I’ve seen, a lot of quilting books will give you instructions on how to make a double fold binding from a 2.5” strip of fabric (FYI it will result in a different version of the double fold, but it is still a double fold as discussed by Clover and Violet). It is then sewed to the quilt with a 1/4” seam allowance, which give you 1/4" wide binding on the front, and a little larger than 1/4" binding on the back. If you want to adjust the binding size to be wider in a quilt pattern, you will have to be mindful of not only how much more fabric you will need, but consider if any of your quilt blocks on the front will get cut off by the border.