Removing 15-91 from cabinet (#40) for servicing (including power cord / foot pedal)

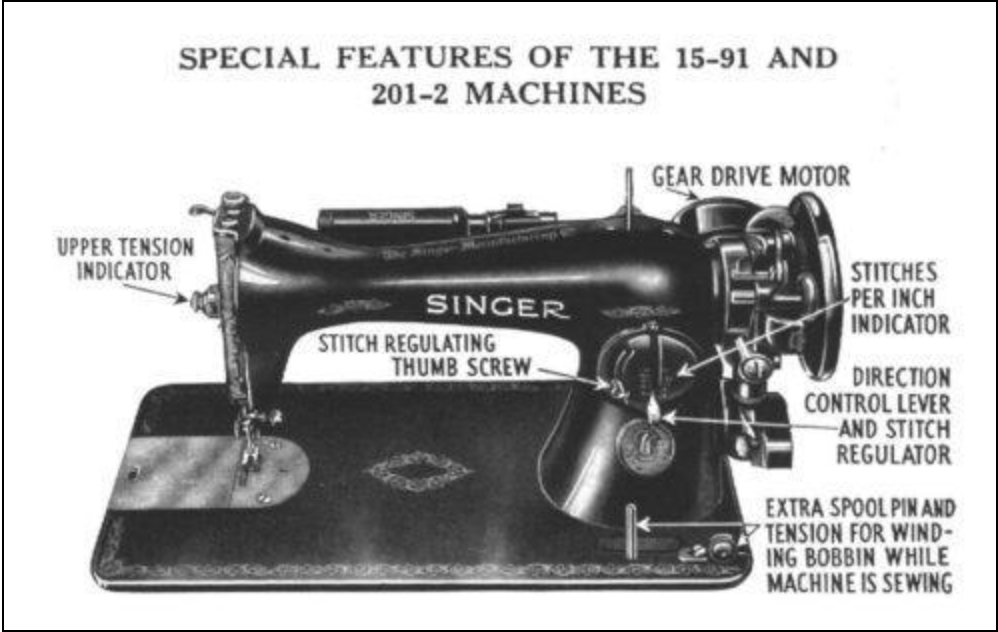
Last November I realized my 15-91 was overdue for servicing (maintenance, internal cleaning, oiling and minor adjustments). Since I have not yet gained the confidence to do my own maintenance and internal cleaning (beyond cleaning out the bobbin area), I figured I should take it into a store.

My father-in-law had it serviced before giving me the machine so this was the first time I was arranging to do this myself. I found a store that was able to service the machine, and the night before I was planning to drop it off I decided I should gather everything I would need (bobbin, bobbin case, screw tool) and remove the machine from my cabinet. Something that should be straight forward, right?

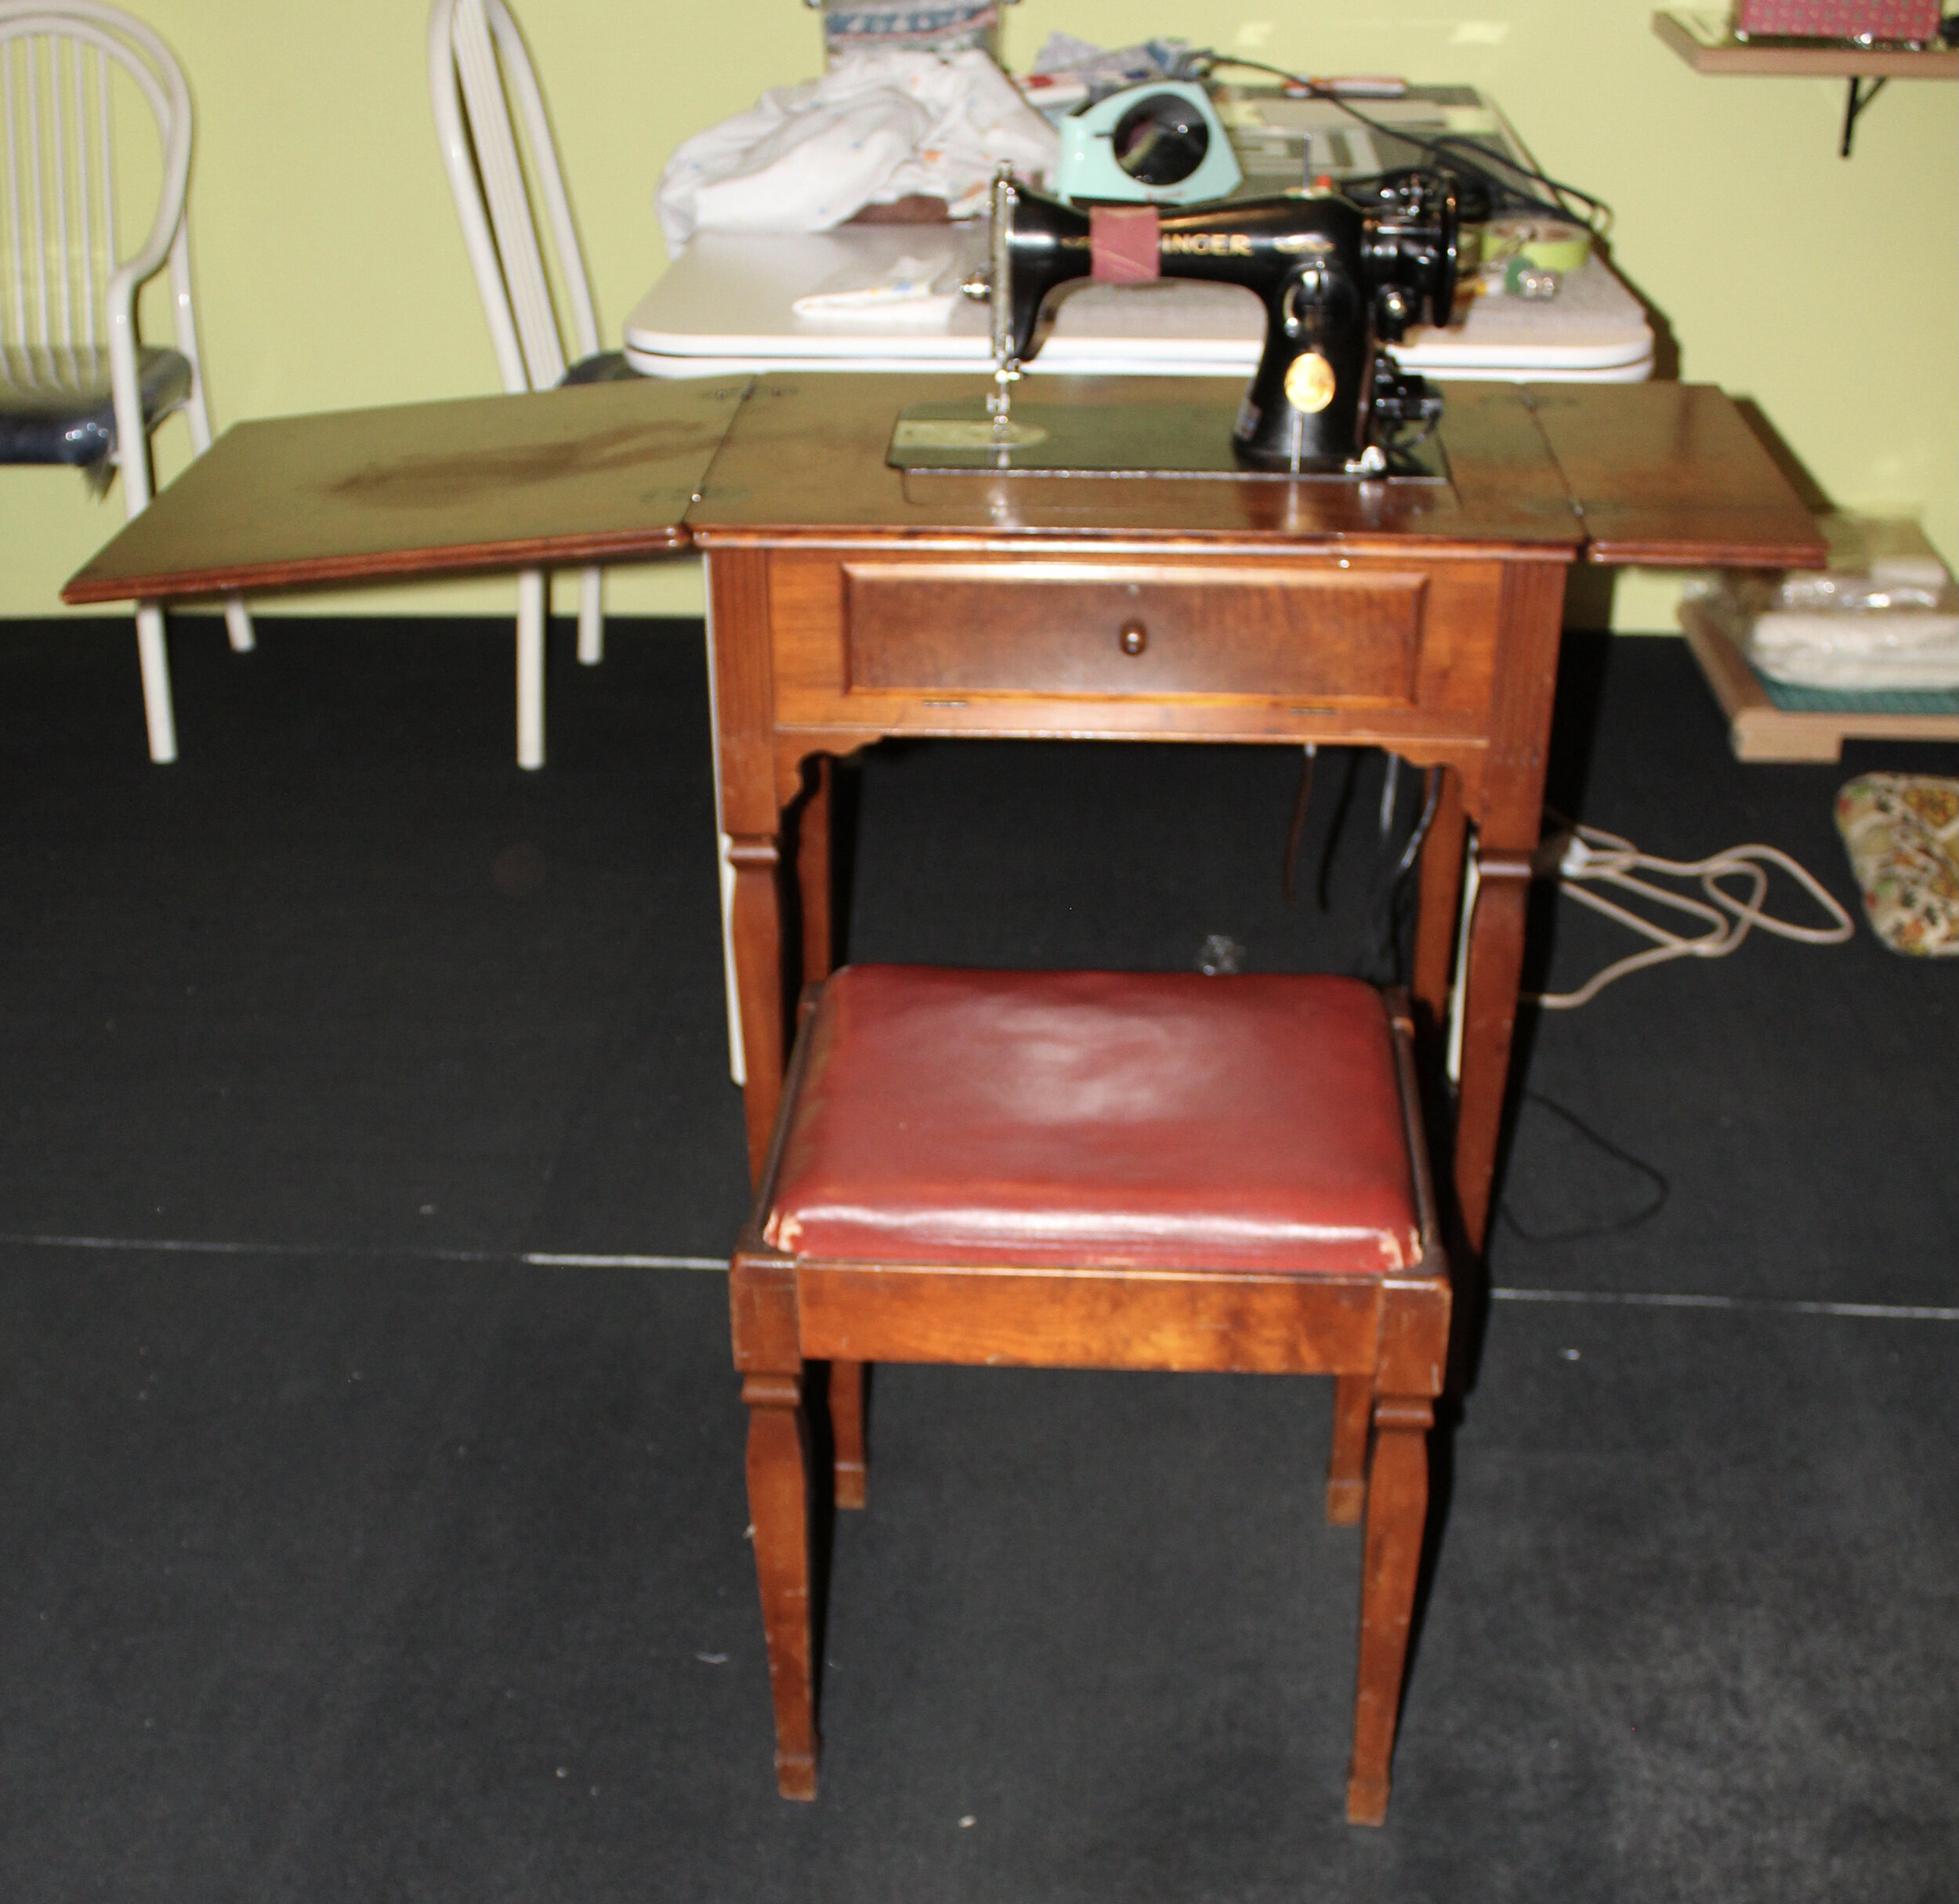
Steps for removing the 15-91 from the cabinet (#40)

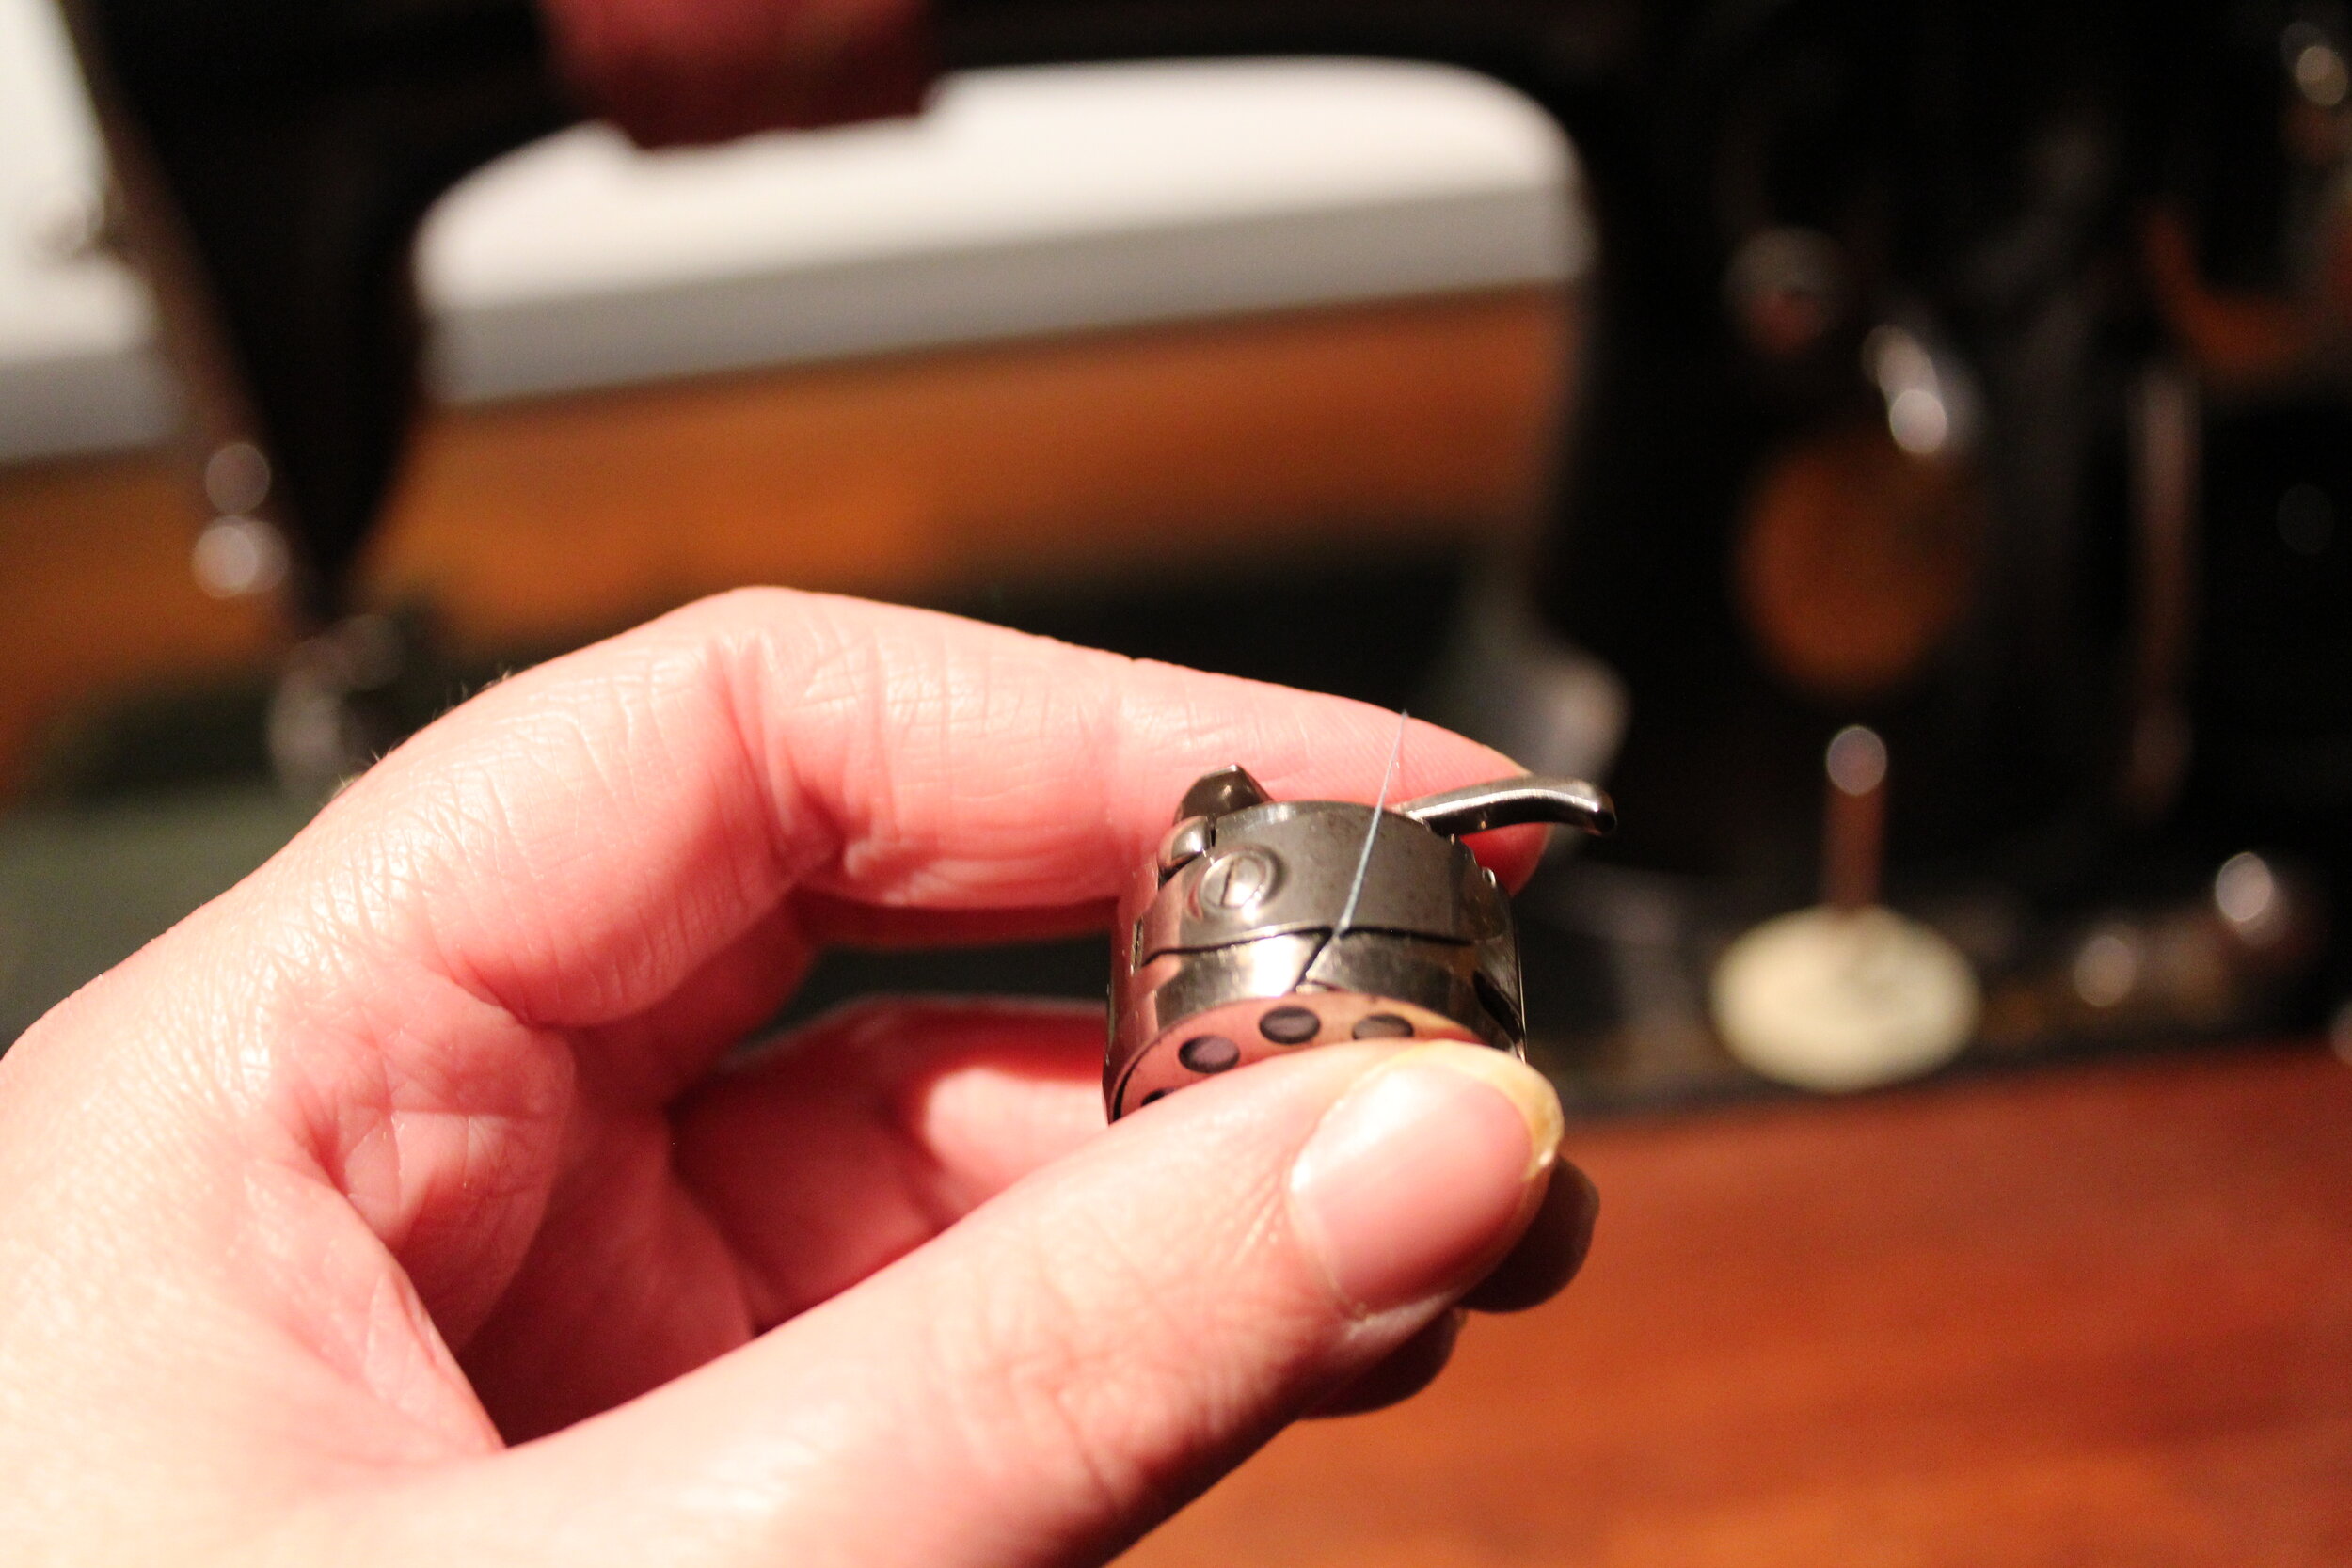
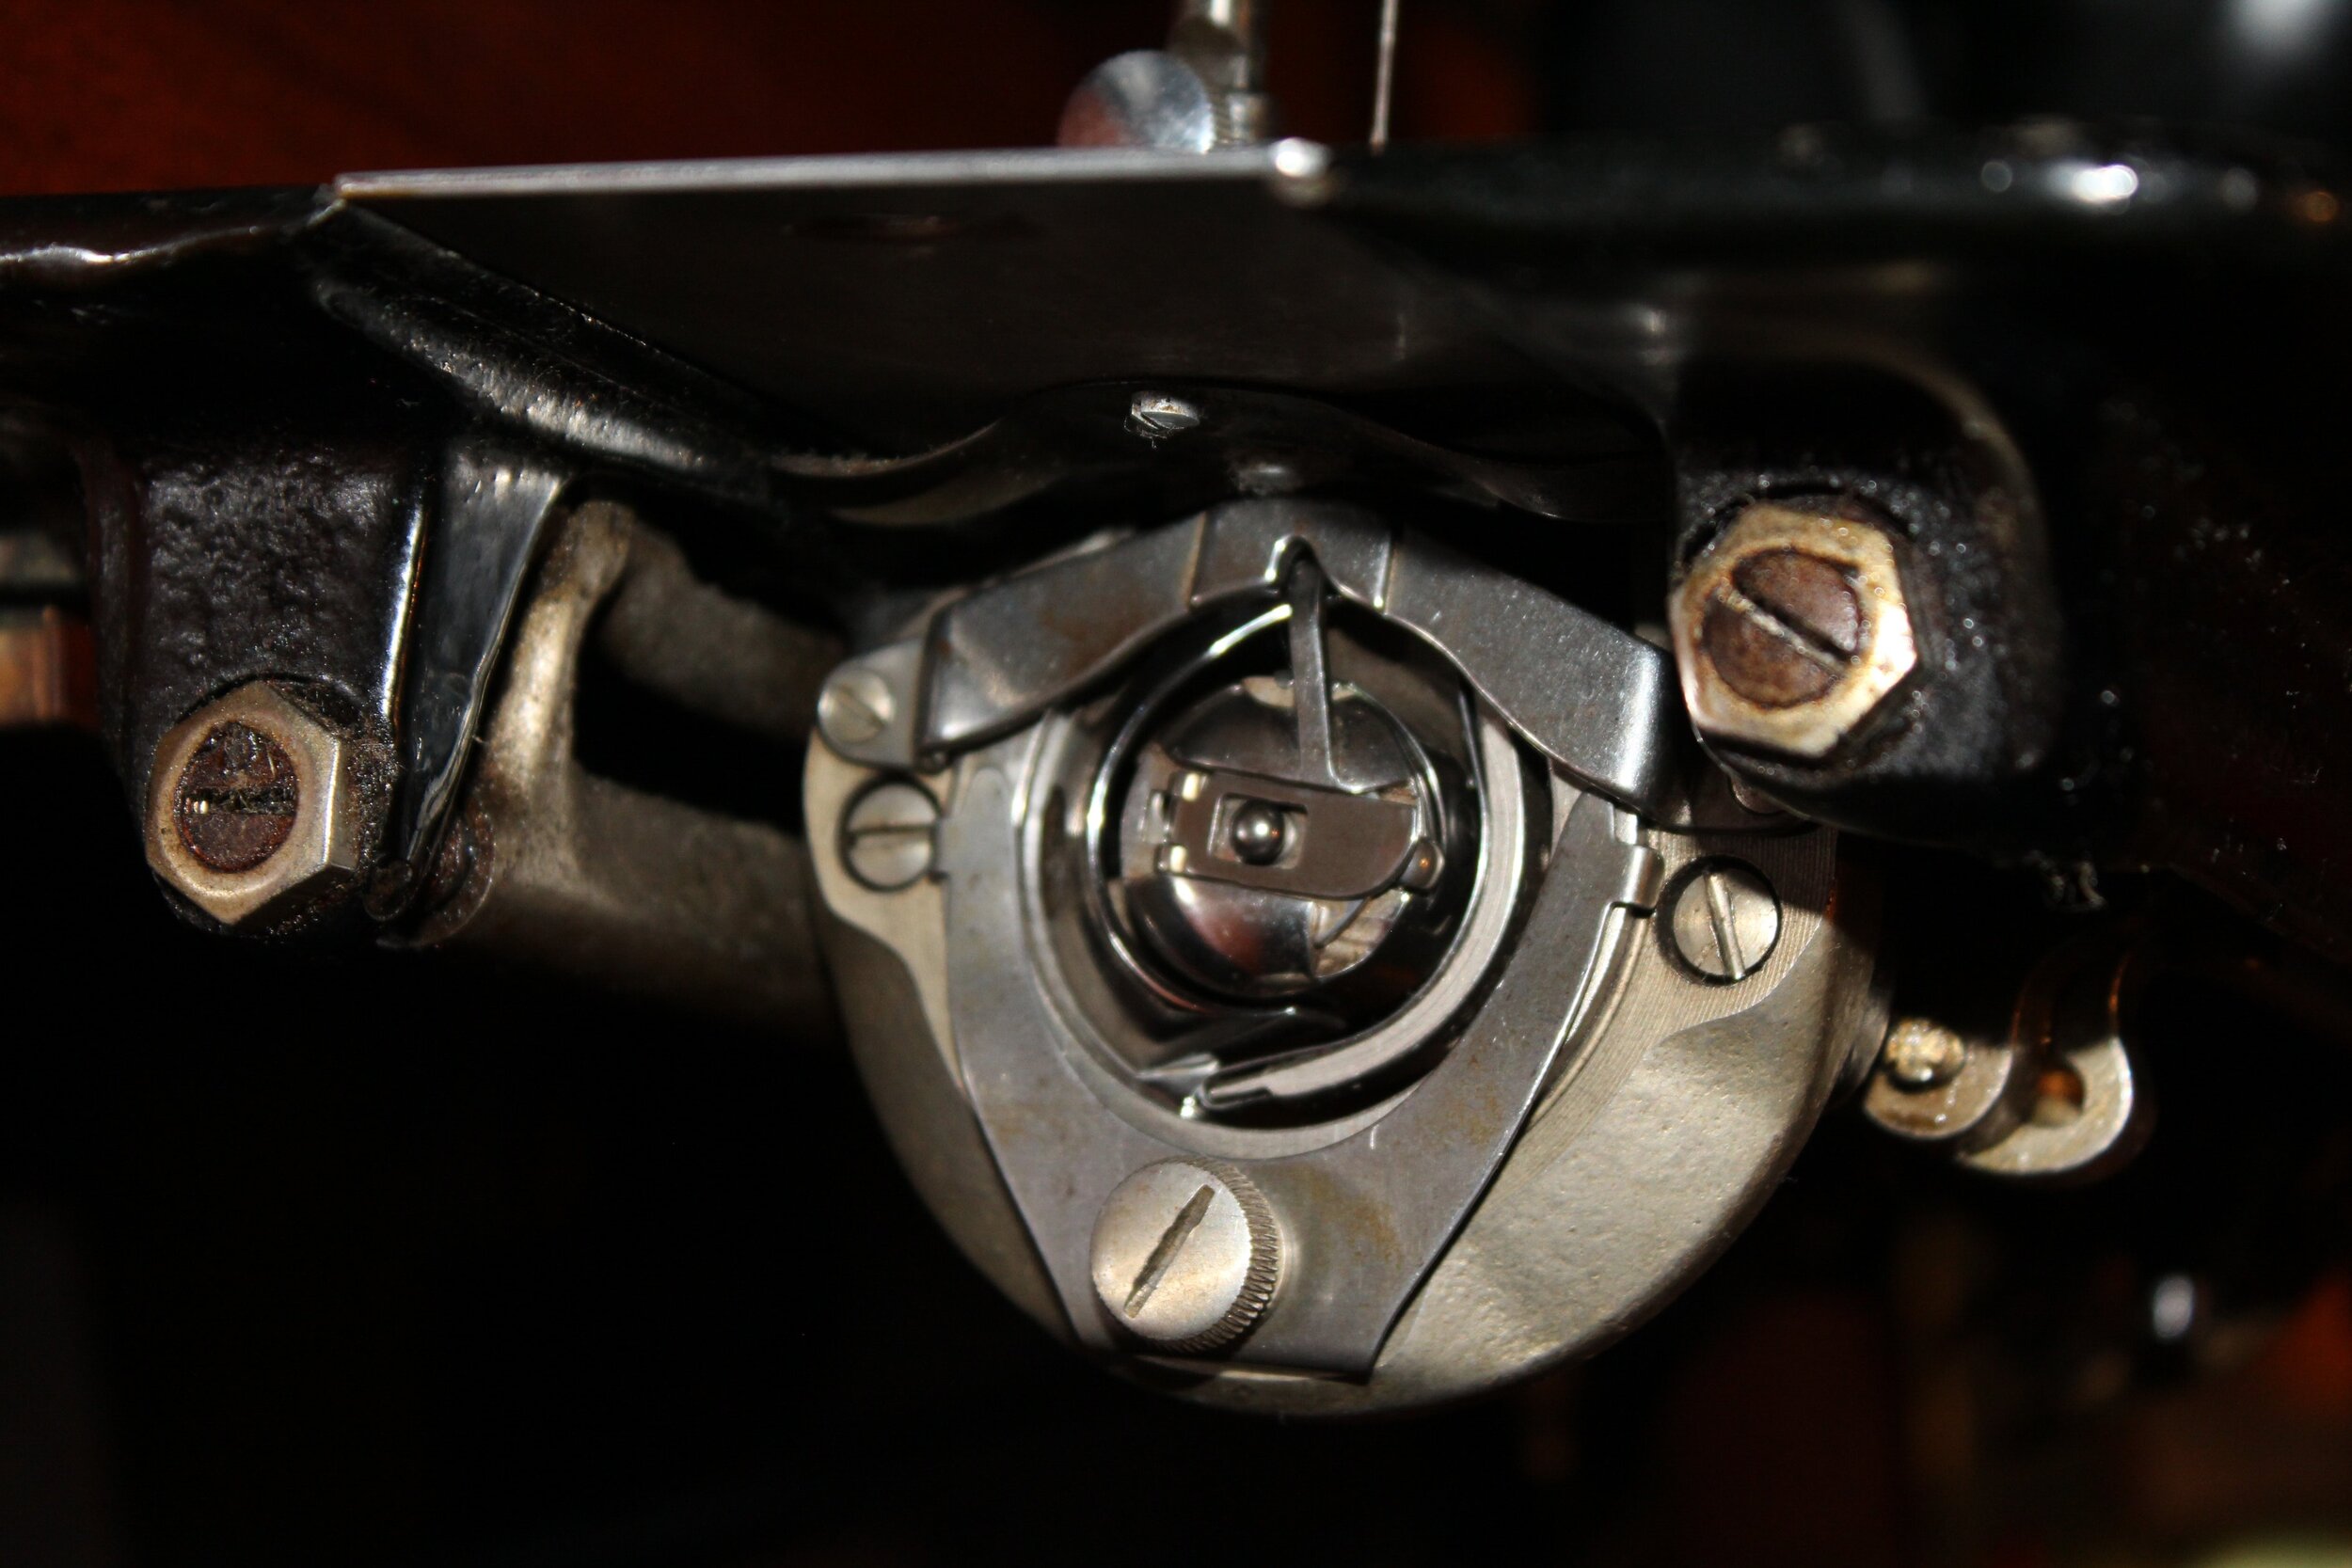
I would recommend before trying to pull out the machine to remove the bobbin and bobbin case and set them off to the side. Otherwise as you move the machine it is possible that the bobbin case and bobbin will fall out, and roll somewhere inconvenient. If you are planning to take the machine into a store for servicing, remember to bring the bobbin and bobbin case with the machine.

Unplug the 3-pin terminal plug from the machine

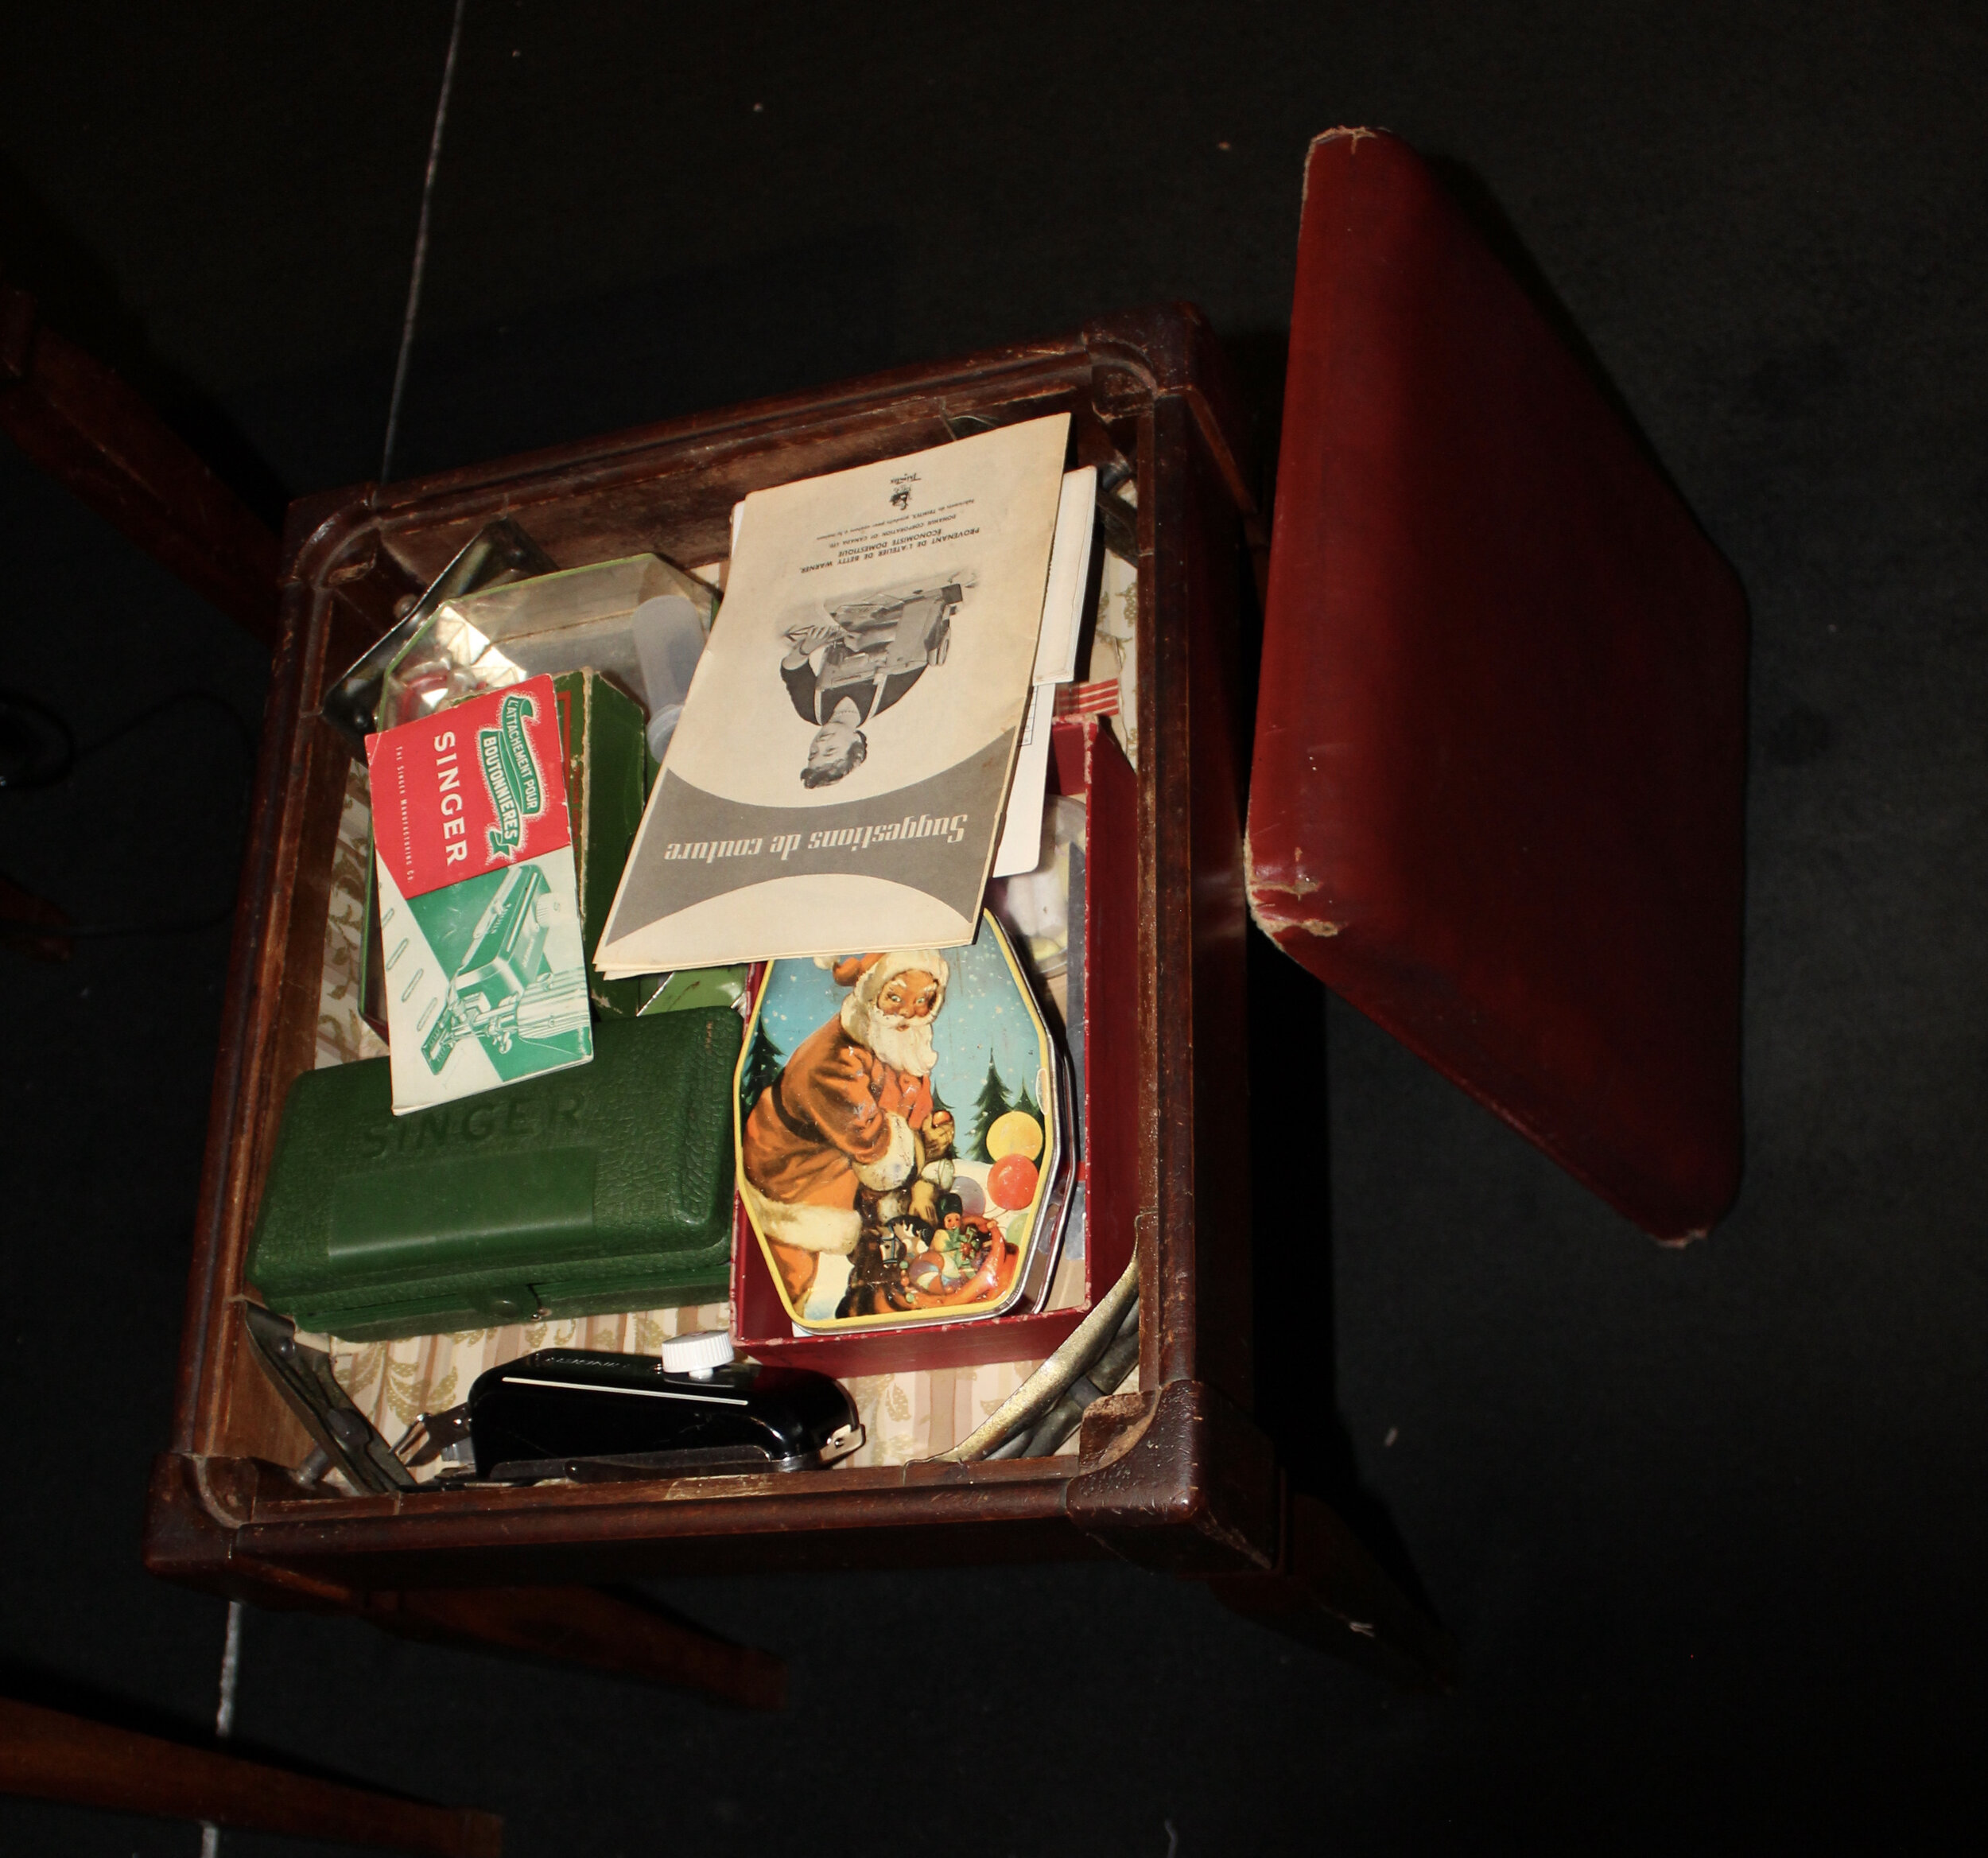
I apologize for all the dust…

Unscrew the hinges that attach the 15-91 to the cabinet. There should be 2.

Lift out the machine

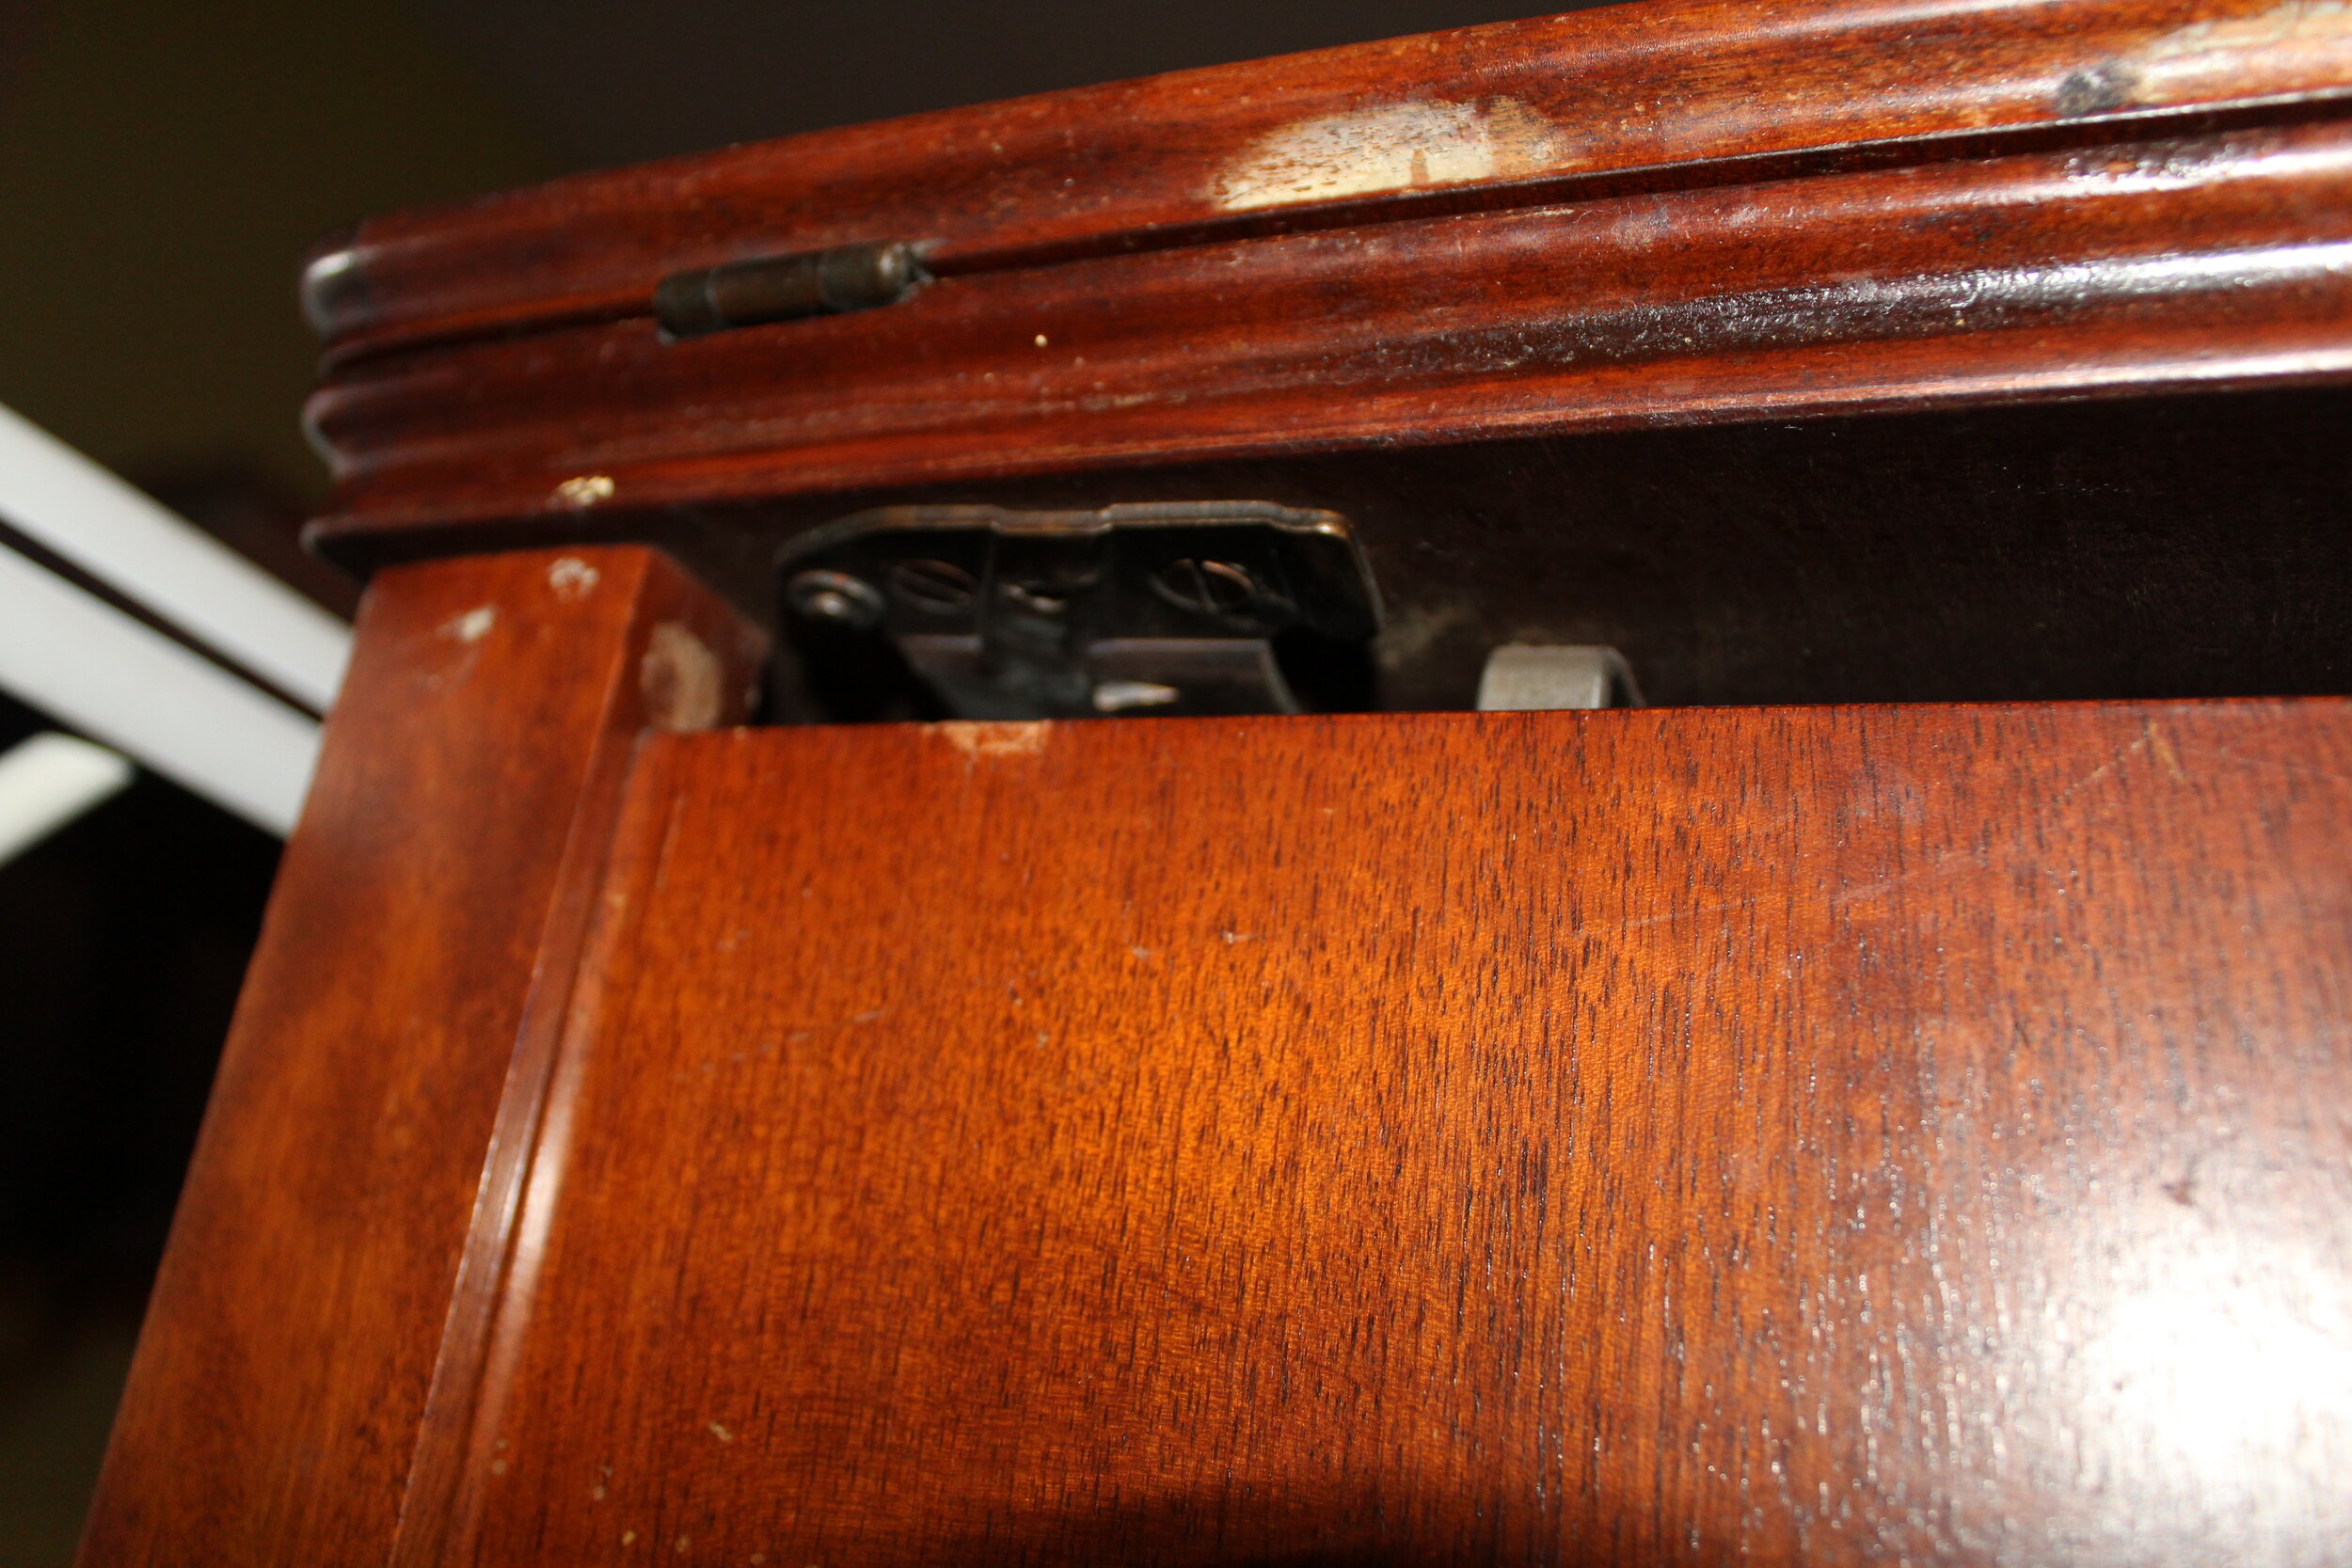
Great, the machine is removed. But wait, what about the power cord and foot pedal??? You will notice the size of the 3-pin terminal plug prevents you from pulling the cord through the cabinet in one direction. And the foot pedal prevent you from pulling the cord in the other direction. The hole in the metal plate is simply too small.

I had no idea how my father-in-law handled this previously but typically when a shop services a sewing machine they request the power cord and foot pedal to be able to run the machine. And I really didn’t want to carry the cabinet with me into the sewing shop just for the power cord.

I went to google. A lot of the initial results just covered how to remove the machine, not really mentioning anything about the power cord. Or covered how to dismount the foot pedal from cabinet (instead of using the knee pedal). Or vague references to removing the power cord with no details covering what that exactly meant.

I even checked the adjuster’s manual for the 15-91 but it mostly covered the machine itself, not the cabinet.

Then I started getting into results that suggested rewiring? I couldn’t quite make sense of that. One of the nice things about having 15-91 is the ability to self-service the machine. You can open and adjust the machine easily yourself. Rewiring just didn’t seem to fit into that self-service vision.

What was starting to make more sense was all those vintage singer machines with cut (or missing) power cords. People had likely grown frustrated with trying to remove their machine from a cabinet, and in a rage just cut the cord. BUT I WAS NOT READY TO ADMIT DEFEAT.

So I turned the cabinet upside down trying to evaluate what my options were.

Steps for removing the power cord / foot pedal for the 15-91 from the cabinet (#40)

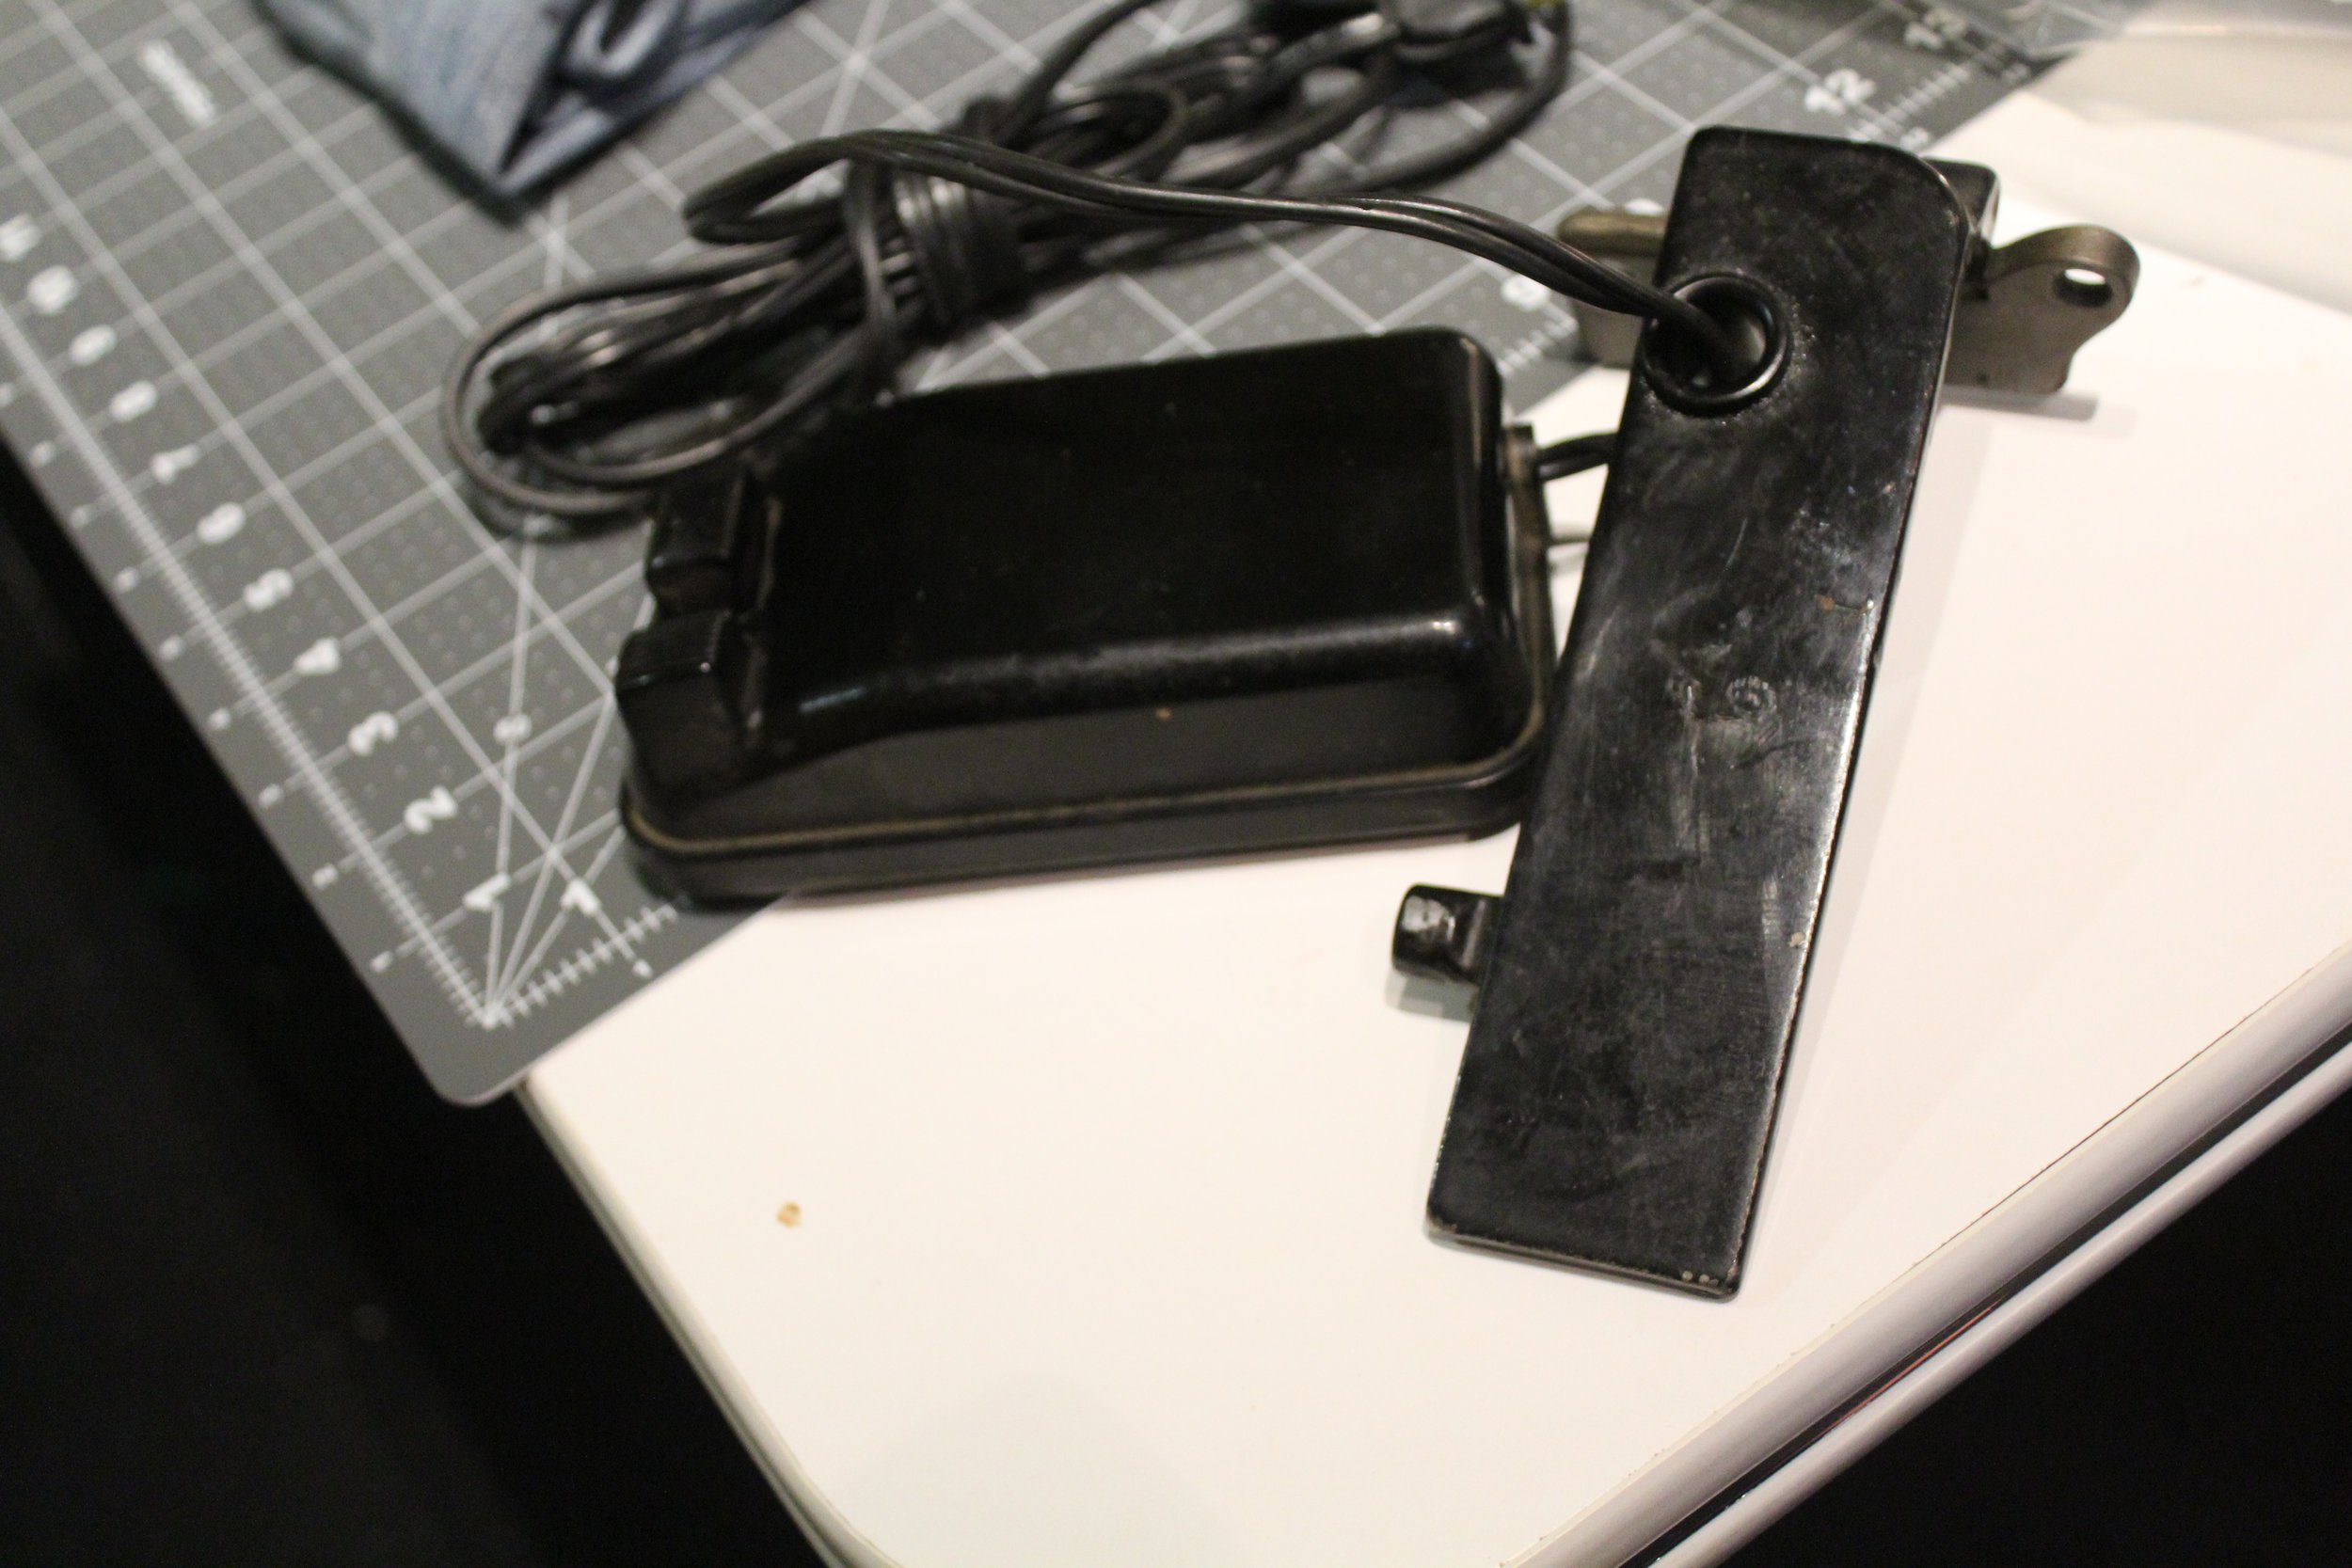
Before we start I would recommend sliding your foot pedal out of its case/holder. Since its a tight space, the more room we can give ourselves to see and maneuver, the better. It might be a bit sticky but the food pedal should slide out out of its holder.

Now what is important to note is that the cable is passing through a hole in a metal plate that helps hold up the 15-91. There is no way to push the cord with the 3-pin terminal through the hole. Which means the only path forward is to remove the metal plate from the cabinet. But how?

If we look closely we can see there are screws holding the metal plate into the cabinet.

Now at this point you might be tempted to go straight to those screws and start unscrewing them (like I did). BUT WAIT. You will quickly realize that while you can easily remove one of the screws. The other one is very hard to reach. And even if you can manage to reach it, there is a third screw you can’t even see that you will not be able to reach due to the spring mechanism being in the way.

Yes, this means you will need to remove the spring mechanism to reach the screws. Take a close look at the spring mechanism.

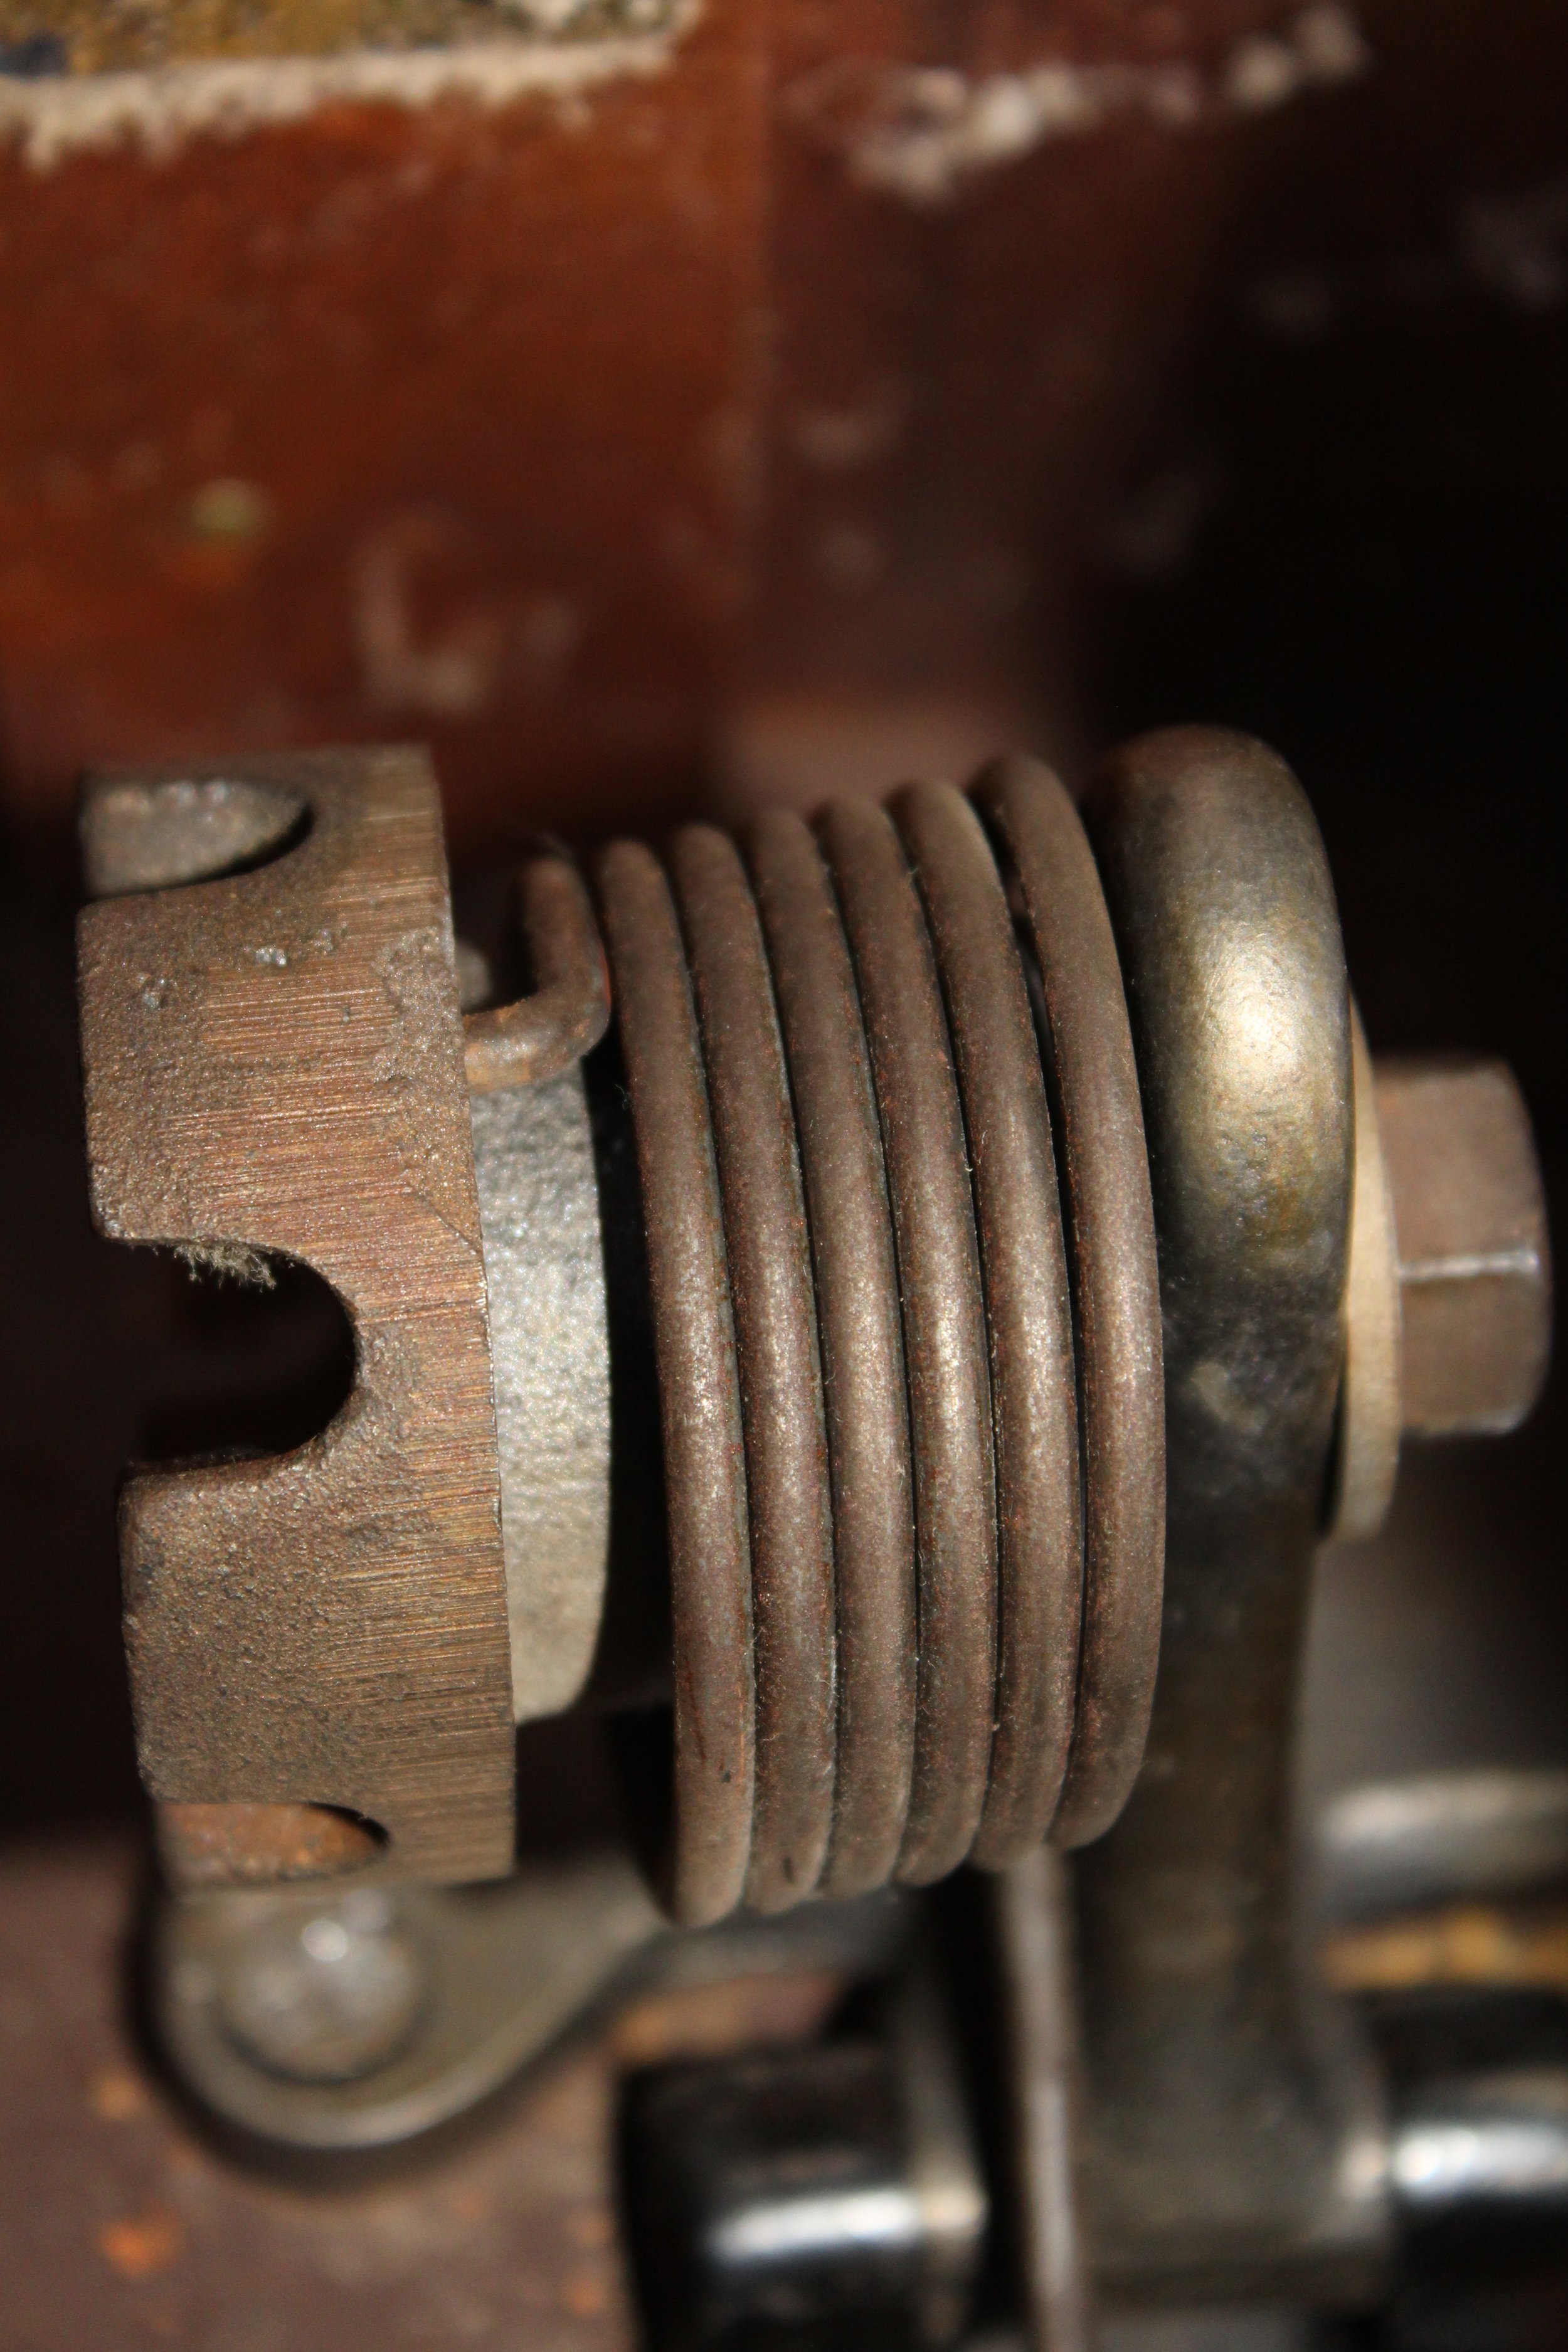
While I’m not an expert in springs, it looks like we have a torsion spring. I’m not entirely sure what to call the part on the left (perhaps an anchor?) but it is helping to hold the tension in the spring and you can see the spring is inserted into it. You can’t see it from this angle but there is also a very long screw passing through this part through the entire mechanism. As we travel to the right, we of course have the spring, the hinge of the metal plate that our cord is passing through, a washer, and then finally a nut. The screw passing through the entire mechanism has been tightened by the nut. Which means we need to undo the nut to take this apart.

Based on my own experience, I found using a 15 mm ratchet worked well for a nut of this size. Be aware as you are loosening the nut that the tension in the spring will be released (and could be released quite suddenly). Since the entire cabinet is upside down, we don’t need to worry about the metal plate being released (once the tension is gone) and hitting us in the face. Another reason to do this with cabinet upside down…

Keep in mind that when you have to put this all back together you will need to add tension back to the spring by tightening it before securing it in place. If you don’t, then the metal plate won’t have any tension helping to hold it up.

Once you remove it, you should have the anchor (?), spring, washer, nut, and long screw. Put them aside in a safe space.

Now that the spring mechanism is out of the way, we can clearly see all three screws holding the metal plate in place! It will still be a bit tight but much easier to unscrew them with the spring mechanism out of the way.

Before you get too excited, make sure to set aside the screws in a safe place. And viola, now we can pull out the metal plate, with the foot pedal, 3-pin plug, and power cord. Is it slightly embarrassing to carry the power cord and foot pedal with a metal plate + hinge into the sewing store? Yes, it is (the owner had a good chuckle). But far better than having to carrying around the cabinet or give up bringing in the machine to a shop for servicing.

Once I got the machine back, I had to do all these steps in reverse. As I mentioned earlier, it is key to add tension back to the spring before screwing it in place. Another pair of hands can be quite useful to assist with this.

Now can this knowledge be applied to other types of cabinets? I’m not sure as I only have experience with cabinet #40. But I would definitely recommend if you are having similar problems with your cabinet to turn it upside down and check what you have going on down there. It is not necessary to rewire the machine just to remove the foot pedal and power cord from the main sewing cabinet. It might just require removing some additional parts from the cabinet.

15-91 Cabinet # 40 (incl. support arm repair)

As you may of noticed in my other posts, my 15-91 came with a table that it sits in (and a matching chair). I wanted to know more about this table so I first began with the ismacs.net site.

IMG_1513.JPG
Above: Singer Cabinet (plus chair) when openLeft: Singer Cabinet (plus chair) when closed. Machine is actually tucked in under the table when in the closed position

Above: Singer Cabinet (plus chair) when open

Left: Singer Cabinet (plus chair) when closed. Machine is actually tucked in under the table when in the closed position

First thing I learned is that these tables are actually called cabinets. And that there are only 6 cabinets for the 15-91 listed. My cabinet is clearly the #40 cabinet. There are two versions of this cabinet but it looks like I have the standard #40 cabinet since I don’t have the curved legs that indicate the Queen Anne style. There is frustratingly little detail though on this cabinet on the ismacs.net site. For example, it doesn’t mention anything about the years this cabinet was produced or the cabinet drawer. The accompanying chair isn’t even shown! When I look at the page for the #40 cabinet (Queen Anne Style) in comparison, it does at least show the chair and mentions the drawer. I can also surmise from the description that other singer models were used with this cabinet in addition to the 15-91. See below for some features of the #40 cabinet I have.

Edit: Adding some extra resources I found on the #40 cabinet

  • Blog post where the author did some neat updates on their #40 cabinet to fit a modern machine. Includes some research they try to do on their cabinet:

  • Another blog post where the author looked at advertisements for various singer cabinets. The #40 cabinet is towards the end of the post.

IMG_1514.JPG
Above: Cabinet drawer that pulls out. When I asked about the metal piece in the cabinet (on the far right side of the drawer) in https://www.quiltingboard.com/ forums, they mentioned that they thought it was to hold an oil can (to oil the machine).Left: Chair/stool that came with the cabinet actually has space underneath the cushion to store items.

Above: Cabinet drawer that pulls out. When I asked about the metal piece in the cabinet (on the far right side of the drawer) in https://www.quiltingboard.com/ forums, they mentioned that they thought it was to hold an oil can (to oil the machine).

Left: Chair/stool that came with the cabinet actually has space underneath the cushion to store items.

You will notice on the right side of the photo that there is a pedal. This is actually a knee pedal and when i push against it with my knee (when I’m sitting at the machine) it will run the sewing machine. Similar to a foot pedal. The harder I push with my knee, the faster the machine goes. It took a little while to get used to using it but I actually like it quite a bit.

You will notice on the right side of the photo that there is a pedal. This is actually a knee pedal and when i push against it with my knee (when I’m sitting at the machine) it will run the sewing machine. Similar to a foot pedal. The harder I push with my knee, the faster the machine goes. It took a little while to get used to using it but I actually like it quite a bit.

I was somewhat resigned that I wouldn’t learn anymore about the table however I noticed right away when I got the machine + cabinet that there seemed to be a problem with the table. If you look at my photo below, you notice on the left leaf of the table, there is an obvious slant towards the ground. I was concerned about this because 1) I was worried the leaf would break off if I put any weight on it, and 2) It somewhat hampered my quilting (the weight of the quilt caused it to start sliding off towards the left).

IMG_1550.JPG

When I took a closer look in the area under the sagging leaf, I noticed a suspiciously sized space. A perfectly sized space for a support arm? Closer examination under the table, revealed a screwed plate that didn’t seem to serve any current purpose on the machine. Perhaps a left over piece from the support arm?

IMG_1537.JPG

More research was needed. Some wandering on the internet brought me to the https://www.quiltingboard.com/ forums, who confirmed that not only did some cabinet models have a support arm, but that it automatically springs out when you left the leaf??? Well now I have to fix it. I took up the suggestion in the forum to buy a singer support arm on ebay. While I waited for it I read PAPPP’s Rambling where they try to fix their #42 cabinet support arm, hoping I might understand the mechanics of this arm a bit better.

Screen Shot 2021-08-25 at 3.20.16 PM.png

Now this was my first mistake. And to spare you from making the same mistake I did, I will tell you why. What I SHOULD have done first, before ordering any parts, was remove the current screw plate and examine the part to see if it aligned with the sold part. Because as it turns out, there are different types of singer sewing machine cabinet support arms. Something I found out the day my part arrived when taking off the screw plate to replace it.

On the left is the older screw plate. On the right is the screw plate with the support arm I ordered. As you can see, the top two holes seem to align however the bottom hole clearly does not. Also the hole for the pin (top far left) doesn’t align quite right.

On the left is the older screw plate. On the right is the screw plate with the support arm I ordered. As you can see, the top two holes seem to align however the bottom hole clearly does not. Also the hole for the pin (top far left) doesn’t align quite right.

Now if you are like me and order the wrong part, you can try to make this work. I was able to screw 2 out of 3 of the screws in, however the automatic swing out feature for the support bar when I lift the cabinet leaf wasn’t working. And I couldn’t push the support arm under the table when the leaves of the table are closed. While I didn’t know the exact mechanics of the support arm, I suspected this had to do with the ‘pin’ under the table and the fact it didn’t align with the hole on this new screw plate.

I suppose I could have left the cabinet alone at this point. The leaf was now supported and I had a level surface to sew on. BUT NO! I was determined to get this cabinet properly fixed so I went back to ebay (I blame my engineering background). Now luckily for me, there was a part number on the original screw plate that came with the table (Simanco 136259). When I looked up this part number on ebay I was able to find a support arm. When I scrutinized the photo it did look like it aligned more closely with my original screw plate (compared to the part I previously ordered). I went ahead and ordered it (and ignored my significant other’s grumbling on how unnecessary this all was).

Eventually the part arrived and it… sat on my sewing table for 4 months. My excuse is that life kept me busy, but I was also not excited about climbing under the cabinet to try to screw in screws, without stripping them, in a tight space (my first time doing this when installing the wrong support arm was terrible). I FINALLY built up the courage today to install it.

It was surprisingly… straightforward? All the holes aligned and I was able to screw in all 3 screws. The pin fit perfectly into the remaining hole in the screw plate and I screwed in the spring (see below for how the spring is installed - I installed the spring before for the first support part I ordered, but I thought it might be helpful to include a reference photo this 2nd time).

And now for the moment of truth. Does the support arm work? See for yourself:

(I apologize in advance for the video quality. I’m using my phone and I’m often taking videos without any assistance)

Success! Finally my saga with the cabinet support arm can come to a close. Thanks everyone who helped me out! And if you happen to need a singer support arm that doesn’t go with a #40 cabinet and live in Canada… let me know! Otherwise this extra support arm I now have is just going to languish in my sewing room.

15-91 Threading the Needle

Threading the 15-91 (and your needle)

Like with winding your bobbin, I think the 15-91 manual actually does a decent job of describing the process. I’ll include some extra photos though for reference to help you out if you are struggling. Plus, there are a few tools you can actually use to pass the thread through the needle, and I personally wouldn’t have figured that out without someone showing me.

Thread the Bobbin Case

You can start by loading your bobbin case with a bobbin and pulling the thread up through slot and hook under the spring (see pg 15 of the manual)

Sliding the thread up the slot on the bobbin case

Sliding the thread up the slot on the bobbin case

Hooking the thread under the spring

Hooking the thread under the spring

Put bobbin case under the needle plate

Put bobbin case under the needle plate

Once you have threaded the bobbin case, you can add it to its spot under the needle plate. However, you won’t be able to pull up the bobbin thread through the plate until you have threaded the machine.

Follow pg 10-11 to thread the upper needle. As you can see from my photo, I should of risen the take-up lever before trying to thread

Screen Shot 2021-02-24 at 11.34.04 PM.png
IMG_1682.jpg

Now before you try to pass the thread through the eye of the needle, you should know there are tools that can help you. Take for instance the needle threader pictured below. You can actually use it to pull the thread through the needle (see below).

Needle threader

Needle threader

Push needle threader through eye of needle and place the thread in between the wires that you pushed through the needle eye

Push needle threader through eye of needle and place the thread in between the wires that you pushed through the needle eye

Pull the needle threader back and while you do that you will see the thread being pulled through the needle eye

Pull the needle threader back and while you do that you will see the thread being pulled through the needle eye

IMG_1676.jpg
IMG_1677.jpg

Voila! You have threaded the needle without minimal effort! Now that you have threaded the needle, you can pull up the bobbin thread. Just turn you balance wheel to move the needle. As the needle goes down it will pick up the bobbin thread. And as you raise the needle you can see a loop of bobbin thread which you can then pull out.

IMG_1679.jpg
IMG_1680.jpg

Quick tricks and adjustments

I was originally going to create a separate post for this topic but I realized if you are like me, and are threading the needle on your 15-91, you are probably ready to start sewing and testing your stitches. Therefore, it is probably more helpful to cover some of these adjustments now, rather than covering them later. Also, I discovered a neat trick on how to cut the thread on your machine without using scissors!

Adjusting stitch size (and how to go in reverse)

You adjust your stitch size by using the lever shown here. It is in number of stitches per inch, so for example if you want your stitch size to be 2mm and you know there is ~25mm in an inch, then you will need about 12 stitches per inch. You can also use a thumb screw to “lock in” your stitch length so if you are switching back and forth from reverse, you don’t have to keep track of what your stitch length is. Simply raise the thumb screw to whatever stitch length you want to use, and tighten it.

Going in reverse is pretty simple. Just raise the lever up all the way.

Screen Shot 2021-02-24 at 10.50.05 PM.png
IMG_1681.jpg

Adjusting Pressure of Pressor Foot

If you want to change the pressure on your presser foot, just adjust the thumb screw shown in the figure as V. Increase the pressure by turning the thumbscrew so it drops. If you actually want to change the height of your presser foot, there is a way to do it but it is a bit involved.

Screen Shot 2021-02-24 at 11.11.03 PM.png
Screen%2BShot%2B2021-02-24%2Bat%2B11.11.25%2BPM.jpg

Adjusting Thread Tension

I haven’t tried to adjust my thread tension yet but it may be necessary depending on what thread you are using (as mentioned in a previous post). There are two places you can adjust the tension: the needle thread tension and the bobbin thread tension.

Screen Shot 2021-02-24 at 11.04.11 PM.png
Screen Shot 2021-02-24 at 11.04.32 PM.png

It shouldn’t be necessary but if you absolutely need to, you can also disassemble your needle thread tension (mentioned on pg. 24)

Cutting thread on the Machine

When I first started sewing on the 15-91, I remember grabbing the scissors to cut the thread connecting the fabric to the machine and thinking, “Man, this is going to get old really quickly.” Good news is there is an easier way! First, credit should be given where credit is due, and I wouldn’t of realized this trick without watching this video demonstration on the 15-91. I was actually researching what are the thread limitations on the 15-91, so I didn’t pick up until my third rewatching that he was actually using a part on the machine to cut the thread instead of scissors.

I tried to film it for you but its hard to film one handed; you really need both hands to cut efficiently on the machine. You can try skipping to 8:35 in the video demonstration if you want a look, but if you look closely at the manual, you can see on the thread cutter on pg 18.

Screen Shot 2021-02-24 at 10.20.43 PM.png
To the left you can see the thread cutter marked as U. The manual describes lifting the fabric back and to the left, but it doesn’t mention that you actually need to pull the threads up to the right and on the thread cutter.

To the left you can see the thread cutter marked as U. The manual describes lifting the fabric back and to the left, but it doesn’t mention that you actually need to pull the threads up to the right and on the thread cutter.

Pulling the threads against the thread cutter. If you want to cut the threads, continue to pull the threads against the thread cutter until they slip through it and cut. After I took this photo I realized I could rotate the thread cutter, so the pos…

Pulling the threads against the thread cutter. If you want to cut the threads, continue to pull the threads against the thread cutter until they slip through it and cut. After I took this photo I realized I could rotate the thread cutter, so the position I have it in now actually doesn’t require me to pull up the thread so far up to the right.

Other Adjustments

There are other adjustments you can do on your 15-91, such as lowering the feed dogs, but I think what I covered above would allow any beginner to get started on their 15-91.

15-91 Winding the Bobbin w/ thread

I actually think the 15-91 manual does a decent job describing how to wind the bobbin, but I decided to write about my experience and include some more reference photos if you are struggling like I was.

Loosen the stop motion screw

The first thing you want to do is loosen the stop motion screw on the balance wheel. If you are looking at the manual, you will see this described at the end of pg 12. You do this so that when you wind the bobbin you aren’t also engaging the needle on the machine (unless you want to wind the bobbin while you are sewing). You only need to loosen the screw a little bit, until you reach the point you can turn the the little metal wheel. As with the screw, you don’t need to turn the metal wheel that much, only until when you move the balance wheel the needle no longer moves.

screwed.jpg
unscrewed.jpg

Bobbin and Bobbin Winder

The manual doesn’t describe adjusting the bobbin winder until pg 14, but I feel like is a useful thing to do before trying to actually wind the bobbin. Doing this will help make sure the pressure for the bobbin winder pulley is appropriate and will actually wind the bobbin.

manualbobbinwinder.png

Now that the machine is adjusted appropriately, it is time to pick your bobbin. As I mentioned in my 15-91 bobbin and bobbin cases post, make sure your bobbin is not bent or deformed. As you turn it, you will notice there is a notch in the side of the bobbin case. This is important because it will align with a notch on the bobbin winder.

IMG_1657.jpg
IMG_1660.jpg

Now that you have inspected the bobbin, go ahead and follow the manual’s instructions to place your thread and bobbin on the machine. When you bring up the thread to the bobbin you will want to thread it through a hole of the left side from the inside and make sure the bobbin is placed on the bobbin winder with the notch lined up in the correct position. Press down the bobbin winder latch against the bobbin.

Screen Shot 2021-02-23 at 11.50.24 PM.png
IMG_1659.jpg
IMG_1658.jpg
IMG_1662.jpg

Now, if everything has been done correctly you should be able to press you pedal (or in my case, my knee pedal), and the bobbin will start to wind with thread. If you are like me, you may end up having to go back and adjust the bobbin winder if you bobbin isn’t winding. Or you can manually roll the bobbin winder pulley a few turns to see if that helps to create enough pressure for the bobbin to begin to wind. Below are some videos, where after some troubleshooting I was able to successfully wind the bobbins with thread.

Some challenges I ran into is that some of my thread spools were a little light (made of plastic), so they had a tendency to rattle off the spool pin if I didn’t hold them down lightly. Also when the manual suggests breaking off the end of thread after a few coils are wound on the bobbin, take that advice. I ended up regretting it when I didn’t do it and my thread end spun out of my hand and wrapped around the bobbin.

If you notice your bobbin winder latch is hot after winding your bobbin, it might be an indication that the pressure is too high and that you need to adjust the bobbin winder again.

ALSO, don’t forget after you finishing winding your bobbins, to tighten your metal wheel and stop motion screw on the balance wheel. Otherwise you will have trouble sewing later on.

15-91 Needle plate

When I first got my 15-91, I realized I might have a problem. You see, I noticed there was no markings on my needle plate that I could use as guide to make sure I was sewing 1/4”, etc. And considering all my quilt patterns specified sewing a 1/4” seam… I took out my ruler hoping I could use the pressor foot as a guide, but no luck, the pressor foot was only 1/8” in width on the right side.

needleplate.jpg

My mother suggested using painter’s tape but I ended up deciding to go check out etsy. To be clear, I think tape is a FANTASTIC idea, I just figured I couldn’t possibly be the first person to run into this problem.

Sure enough, I found someone selling a needle plate with measurements for the 15-91 on etsy and promptly ordered it. It took 10 days, but it has finally arrived!

arrival.jpg
needleplateinstallation.jpg

Removing the old plate was fairly straight forward. I just used the tool that came with the machine to remove the screws from the old plate and pulled it out. The only awkward part was trying to find room for my hand to remove the back screw. As the needle plate seller recommended, I cleaned out the edges a bit before putting the new plate in and adding the screws back.

IMG_1650.jpg

The new needle plate seems to fit well although you will notice it is not precisely in the same position as the old plate. The most important thing though is that the feed dogs are smoothly raising and lowering without any issue. And the for the final test, I took out one of my quilting rulers to check the distance from the needle to the measurements on the plate.

needleplatemeasurement.jpg

Perfect! Not only does the needle plate fit, but the measurements are accurate.

15-91 Bobbins and Bobbin Cases

Earlier this week I was looking at ordering an English version of the 15-91 manual for reference from Etsy (as I mentioned earlier there is a free online copy, but I like working with a paper version). The listing also advertised some bobbin cases and bobbins. While I didn’t necessarily need these things, I also figured it wouldn’t hurt to have some extra on hand, so I went ahead and ordered them. I was not prepared for the seller to come back to me and mention that she had both 11 o’clock bobbin cases and 1 o’clock bobbin cases, and which would I like to have. It had not occurred to me that there might me more than one type of bobbin case, and I wasn’t sure at first which I would need for the 15-91.

Class 15 Bobbins

Before we get to the bobbin cases, lets talk briefly about the bobbins themselves. 15-91 uses class 15 bobbins. This appears to be standard across all the Singer Series 15 machines. And not only that, class 15 bobbins are one of the three major bobbins used today. They are available in both plastic and metal. I have seen some in the vintage community recommend metal over plastic, but that seems more due to personal preference rather than any issue with using plastic bobbins on the 15-91. You may also see slightly different styles in class 15 bobbins (i.e. holes vs solid as you can see in the photo below).

Bobbins that came with my machine

Bobbins that came with my machine

One important thing to note for the 15-91, is that if the sides of your bobbin are warped (i.e. not perfectly parallel), you will struggle to wind the bobbin with thread. I speak from personal experience, as my partner’s parents and I spent a solid 45 minutes trying to figure out why we couldn’t wind the bobbin before we realized the problem was the bobbin itself. So I definitely recommend to check the bobbin first if you are having issues before assuming something is wrong with your machine.

15-91 Bobbin case

The bobbin case is what holds the bobbin in your machine while you sew. On your 15-91 you should be able to see it (or at least see where it should be placed if it isn’t already there) by sliding open a metal panel by the needle plate. If you are having trouble seeing it and are on a sewing cabinet, you could also lift your machine up.

Metal plate.jpg
location of bobbin case.jpg
Location of bobbin case when machine is lifted up

Location of bobbin case when machine is lifted up

Bobbin case when removed from machine

Bobbin case when removed from machine

When you remove the bobbin case for examination, you can see that there is arm sticking up towards the left. It is the position of this arm that determines if your bobbin case is 11 o’clock or 1 o’clock. In this case, this is a 11 o’clock bobbin case and as you probably have figured out by now, only the 11 o’clock bobbin case will work on the 15-91. When I check the comparison chart of the 15 series, it looks like this 11 o’clock style is unique to the 15-75, 15-88, 15-89, 15-90, 15-91, and 15-125 machines in the 15 series. Because of this, you will want to make sure you are getting the right bobbin case for your 15-91 (part #125291).

15-91 Dating the Machine

As I mentioned in my previous post, you can use the serial number on your machine to try to figure out where/when you machine was manufactured.

I was told by the family that my machine is from 1936 but I was curious if I could actually verify this date with the serial number. I already know from my previous research that the 15-91 was manufactured from 1930 and 1956, and that the ‘JB’ prefix on my serial code indicates it was made in Saint-Jean-sur-Richelieu , Quebec between 1936 - 1948. I should make a quick note here that a lot of singer documentation online around serial number prefixes does not use the city name Saint-Jean-sur-Richelieu but instead uses St. John’s. I’m not sure why this is, perhaps due to some english translation that happened at some point? But the city is actually called Saint-Jean-sur-Richelieu.

I first checked the manual that came with the machine to see if there might be some sort of publishing date that could clue me in on the date of manufacturing. No such luck. Next, I scoured the internet but was unable to find any breakdown of serial numbers by year for the Saint-Jean-sur-Richelieu factory. The best I could find was this that mentioned that the prefix is followed by 6 digits starting at 000001 up to 999999.

Serial Number

Serial Number

Looking at my serial number, it is much closer to 999999 than 000001 which casts some doubt on the idea it was actually manufactured in 1936. I suppose it's possible that the machine was manufactured in 1936 and not assigned a serial number until later, but I think that is a bit of a stretch considering how high the serial number is. It is much more likely that this machine is actually from the 1940s.

If I also consider what I know about the previous owner, I think the 1940s makes more sense as well. She was only 16 in 1936, which seems a bit young to not only have her own personal sewing machine, but one that was brand new at the time. That is assuming she was the first owner of the machine, which is honestly not entirely clear. I only know from the family that she had the machine for a very long time and used it up to her death.

Additionally, there is the fact that the family’s primary language is French and mine is English. There could have been some information lost in translation. Perhaps they only meant to say that the machine model is from 1936, not necessarily that this particular machine was actually manufactured in 1936.

Regardless though, whether my machine was actually manufactured in 1936 or sometime in the 1940s, it doesn’t take away my enjoyment of the machine. It is still a 15-91, and one that appears to have been well taken care of by the previous owner.

History of Singer & 15-91

Even if you have never sewed, you might have heard of Singer before. It is a company that has its origins in the 1850s in the USA. And it DOMINATED the sewing machine world. I’m going to focus specifically on the history of the 15-91 but if you want to know more about the company and why it dominated the market, I’ve included some links in the resources below. If you have time, you can also read up on the founder, Isaac Singer, who seems to have led a wild life that at one point involved keeping up multiple separate families that didn’t know about each other….

15-91

The 15-91 is part of the 15 Singer series which was started in 1879. The 15 series is notable not only for how long it was produced, but the number of variants over the series. Technically, Singer stopped manufacturing the 15 series in the 1950s, but you will find clones being manufactured even today (if you are interested in the clones, you can learn more here). If you want more technical details on all the differences in the model 15 series, this is a good resource: Singer Model 15 Comparisons

The 15-91 was manufactured between 1930 and 1956. It has a potted electric motor (introduced first on Singer’s 101 in the 1920s) which is you can see noted in the diagram below. What I find interesting however is that despite the large amount of 15-91s produced and their popularity today, there doesn’t seem any mention of them on Singer’s own website, even in historical terms. In fact, most information I have found on the Singer 15-91 is by going through information put together by vintage sewing machine enthusiasts.

As with many things old, you can now find a lot of resources online for the 15-91 including the manual. There is also an online guide for 15-91 cabinets, which is how I found out I have the No. 40 Cabinet (Queen Anne Style).

If you have a vintage Singer machine, and want to learn more about it, I would recommend using this International Sewing Machine Collectors' Society Guide. You can actually learn a lot from the serial number, including where it was manufactured.

For example, my serial code starts w/ JB. J stands for the manufacturing plant St. Johns (Saint-Jean-sur-Richelieu, Quebec) which verifies what I was told by the family. And JB serial codes were issued from 1936 - 1948. If your machine is also from St Johns you can find more information here.

Resources

Singer Corporation

How Singer Won the Sewing Machine War

Singer History Timeline

Isaac Singer

Interested in more 15-91 Content?

Check out my Singer 15-91 content page that currently lists all the 15-91 specific content on this site.